Background segmentation the easy way in Spark AR

Changing the background on your Instagram and Facebook filters is fairly straightforward, but there is an easier way. Learn just how easy it is to add background segmentation in Spark AR and ensure it is compatible with 3D head decorations. You can see an example of this type of effect in action by clicking here or by scanning the below code.

Why another background segmentation tutorial?
There are already background segmentation tutorials out there, so why this one? Two reasons - 1) there is a simpler way to do it and 2) most of those tutorials don't go into the setup if you want to also include 3D head decorations. Let's get started.
Scene setup
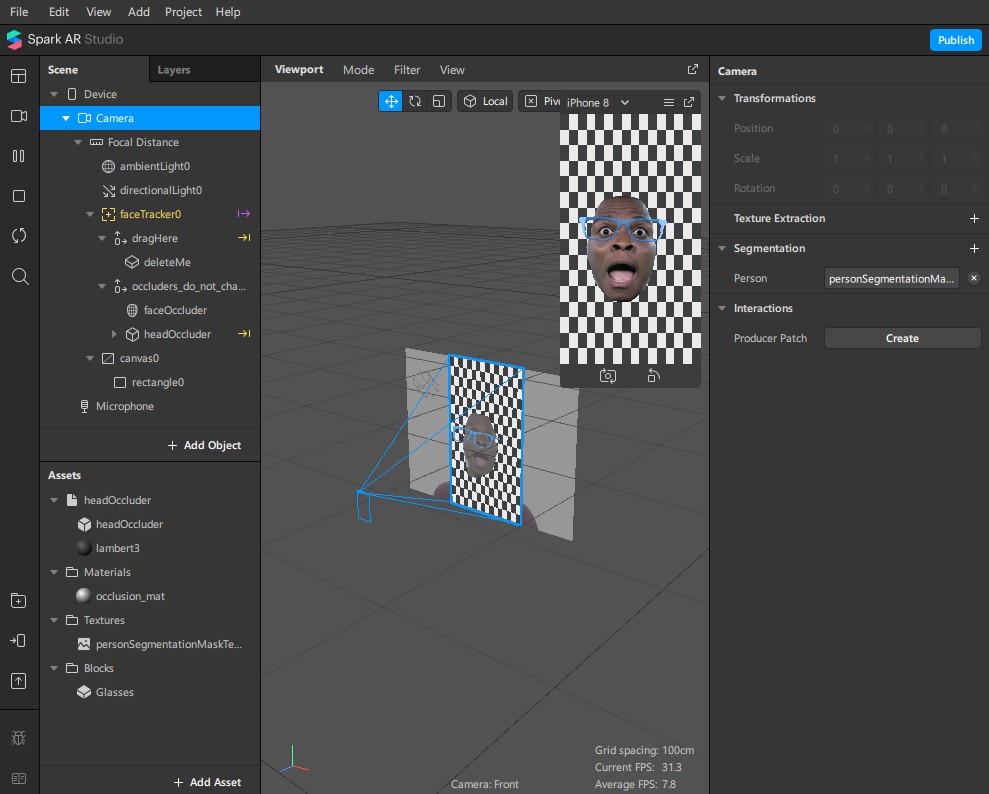
I am going to start with the "Face Decoration" template that is included with Spark AR. This will give us a starting 3D object on the user's head. Feel free to start with a blank project or use whichever face decorations you want.
Once you've opened up the project, add a rectangle to your scene (this will automatically add a canvas as well) and resize it to fill both the width and the height. Next, select the Camera and extract the person segmentation texture. Most tutorials will have you create two rectangles and also extract the camera texture, but we don't actually need to do that (although maybe with a more complicated filter you might need to do it that way).
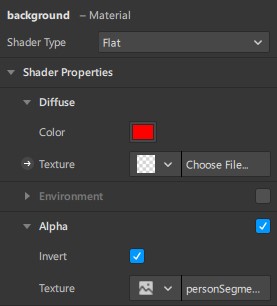
Now it is time to create our material. Create a new material and name it to something like "background." Chnage the Shader Type to "Flat" and then select your image texture. For this tutorial I am just going to change the color of the material rather than select an image. Then enable the Alpha, choose the segmentation texture, then finally enable the "Invert" checkbox. You still won't see any changes in your scene, so select your rectangle and give it this new material we just made. Hooray! It is (mostly) working now!
Make it look good
At this point you might notice that when the user turns their head in the preview that the glasses are being cut off. No worries, we will fix that. Drag the canvas object so that it is above the face tracker. Then select your material, open the Advanced Render Options, and disable "Write to Depth." Now as the user turns their head, the glasses won't disappear behind the background. If you are using a head occluder, you might also want to disable the "Use Depth Test" option. Everything might look good in Spark AR, but if you try it out on your device, certain head angles and positions might cause the occluder to obscure the background. Disabling the Use Depth Test option on the background material should take care of that though.
How does this all work?
In your typical background segmentation tutorial (including the official one from the Spark AR team), they have you create two separate rectangles, one for the user and one for the background. The background is just the background image, and then the user rectangle receives the camera texture and the segmentation texture. Alternatively, you can just invert the segmentation and apply it to the background (which is what we did here). It's just a simpler way to put the user in front of the background.
What about that Write to Depth option? Spark moves down through our scene objects and draws each to the screen. Originally we had our rectangle near the bottom so it was drawing over the top of the glasses. We moved it up to the top so that it was drawn first. We also disabled the Write to Depth option so that Spark would ignore it when deciding whether the rectangle was hiding the glasses. Basically we told Spark to draw the rectangle and then ignore it while drawing everything else to the screen.