Creating a Big Head effect in Spark AR

The "Big Head" effect is a pretty fun type of filter to create. It is pretty easy to make once you learn the trick of texture projection. You can see an example of this type of effect in action by clicking here or by scanning the below code.

What you will need
Our scene will consist of three main parts - the background, the head, and the body. For this tutorial I am going to use a plain color for the background and a 3D model I already have for the body. Feel free to use whatever you wish for your filter.
Creating the head
Once you have your assets ready, head on over to Spark AR and create a blank project. The first thing I am going to do is create the head. Using the built in face mesh and accompanying face texture we can quickly and easily get the face portion done, but what about the rest of the head? Fortunately it is pretty easy too. Go ahead and add a face mesh to your scene and then disable the eyes and mouth checkboxes (this will fill them in with the mesh). Next you'll want to download the Face Reference Assets from Spark AR and import the headOccluder mesh into your project. Once imported, add it to your scene and make sure it is behind the face mesh.
We are using the head mesh to capture most of the user's head and the face mesh to make sure the chin doesn't get cut off when the user opens their mouth.

Now let's create a new material and call it "head." Apply this material to both the face mesh and the head mesh. Next, scale up the head mesh until it more or less covers the user's head. This does not need to be perfect, just make sure you don't make it too big and be sure to test it on different preview videos.
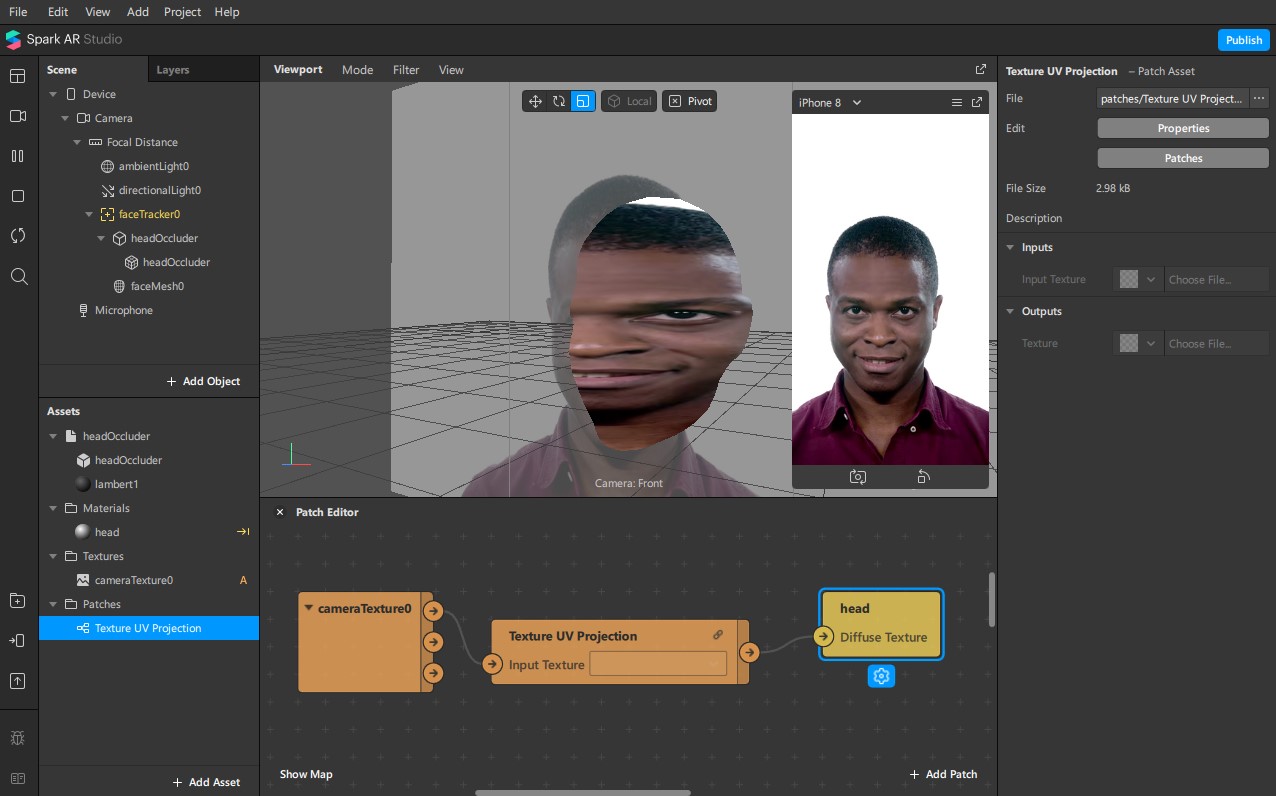
Time for the material setup! Select the head material, change the Shader Type to "Flat," and then click the little arrow next to the Texture slot to create a patch (this should automatically open the patch editor, but if not, go to View -> Show/Hide Patch Editor). Select the Camera in the Scene Panel, extract its texture, and then drag that texture into the patch editor as well.
If you were to connect the camera texture directly to the head texture node, you would get something pretty funky looking because it is trying to apply the entire camera texture onto the mesh. To fix this, we are going to project the camera texture onto the mesh. What this means is that wherever the face and head mesh are, their texture will just be whatever the camera sees right there. The downside of this is that we can't move our face and head mesh off to the side, but that won't be a problem for this type of filter.
To project the camera texture onto our face and head models, open up the AR Library and search for the "Texture Projection" patch asset. Import that into your project and then stick it between the camera texture and the head texture patches. The meshes in the viewport will now look pretty funky, but in the preview window it should look like nothing has been added to the filter. That is exactly what we want.
Add the background
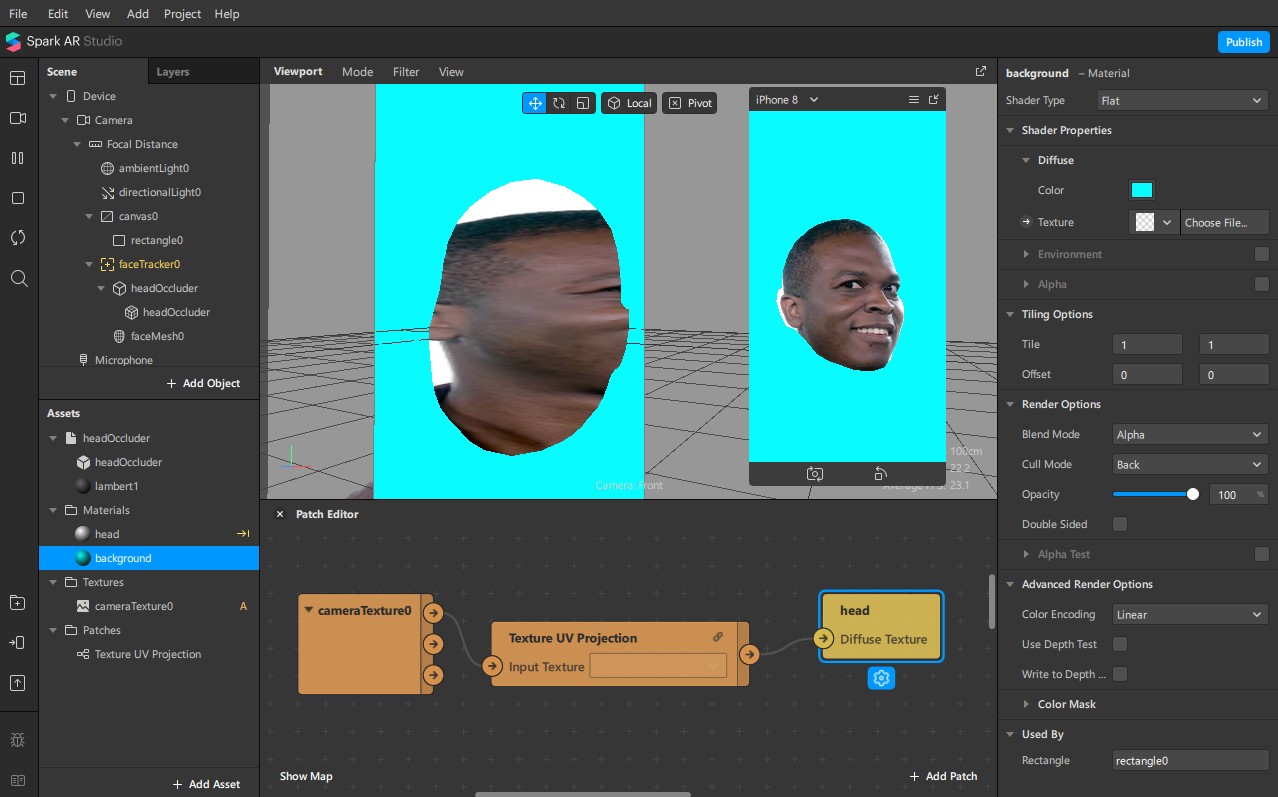
I am just using a simple colored background here, but you can use any background you want. Here I am creating a new material named "background," changing to to a flat shader type, changing the color, and then applying it to a rectangle. Currently the background is cutting through the face and head meshes, so in the Advanced Render Options of the material I am going to disable the "Use Depth Test" and "Write to Depth" options and then move my rectangle up above the face tracker in my scene hierarchy. With our background added you can now see the full head!
Add the body
This isn't a 3D modeling tutorial, so I'm not going into the details of creating the body; I assume you already have a 3D model ready. Import your model, add it to the face tracker, setup the materials, and then position and scale the model so it lines up with the head. You are good to go!
Final notes
In general, the further away the user is from the camera, the less of the background gets picked up by the head mesh. Also important to note is that as the user turns their head you may get a little more of the background showing through. If you do have too much background showing thorugh, all you need to do is scale the mesh down a bit. You won't get perfect results because everyone's head is shaped differently and we all have different hair styles, but you can still get really good results. And if the filter is fun, that little bit of background won't be a big deal