Easily create freckles using Spark AR Studio
In this tutorial we'll go over how to easily create freckles using Spark AR Studio. You can see an example of this effect by clicking here or by scanning the below code.

Creating the freckles
Now, this is a Spark AR tutorial, not a Photoshop or Illustrator tutorial, so I won't go into detail as to how to actually create the freckles. I am assuming you have access to, and familiarity with, some sort of graphics program.
- Start by going to the Spark AR Face Reference Assets page and click the link to download the assets. Once the zip file is finished downloading, go ahead and unzip it.
- Open up your graphics program. I personally use the Affinity line of software, but you can use Photoshop, Illustrator, GIMP, Inkscape, etc. Whatever you have and are comfortable with will work.
- Use either the feminine or masculine face texture from inside the
Texturesfolder. As far as positions of facial features, both are identical so you can use either to place your freckles. - Once you are happy with your design, export it as a PNG file. For freckles we need the transparency, so a JPEG file won't work.
- I recommend exporting your design in all white if it is a single color design. If it is a multi-color design then it's fine to leave the colors. The benefit to a white design is that over in Spark AR it will be easy to set the color using the material.
Setting up the scene
It is easy to add freckles to an existing filter, or you can start with a new, blank project. All you need to do is add a face mesh to the scene.
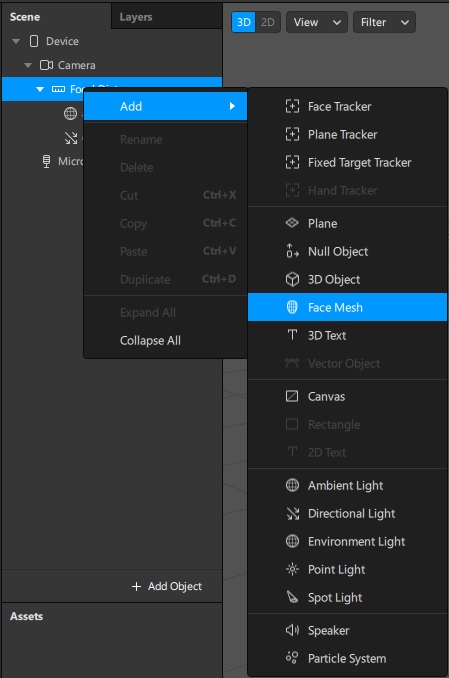
Add the freckles
Down in the Assets Panel, import your freckles image that you created and add a new material.
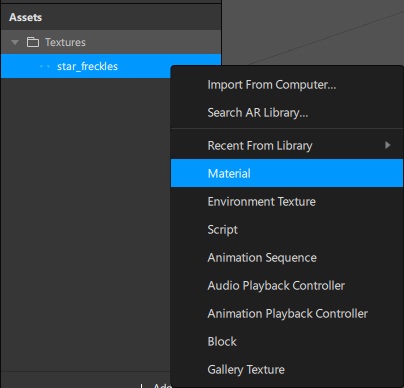
Select the face mesh up the Scene Panel and assign the new material to the face mesh. Now go back to the Assets Panel and select the material. For the texture, choose the freckles image. Your freckles should now show up in the preview window! Depending on your freckles design, you can try out a Flat shader, but in my case I'm going with a Physically-Based shader.
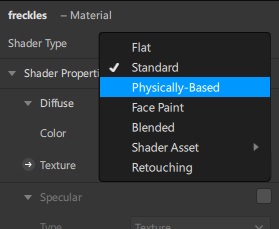
Adjust the color if needed, and set any other material parameters you want. I want to get that shiny sticker look so I turned the Metallic parameter all the way up and added just a touch of Roughness. The Metallic parameter should be adding shine to the freckles, but now they look dark! The problem is that there is nothing really to be reflected, so to add the reflections, enable the Environment option for the shader and import a new environment texture from the AR Library. Now the reflections should be showing up!
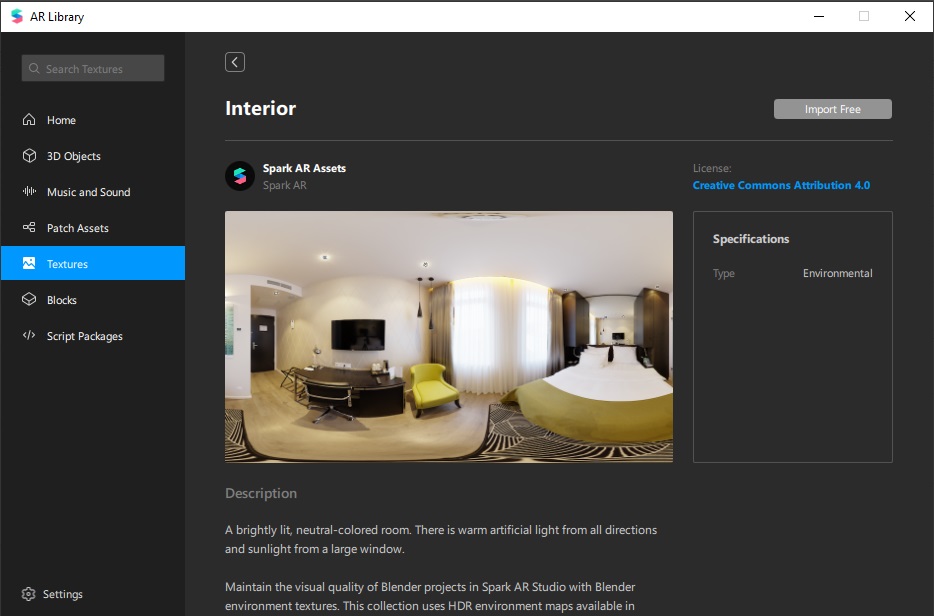
Finishing up
Add a Face Retouch or anything else if you desire, and at this point you are ready to submit your effect!
