How to add grain to your Instagram and Facebook filters
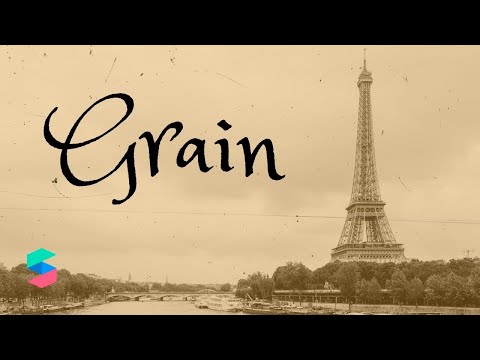
Grain is a pretty popular addition to many Instagram filters. Done right, it can add a vintage look to your filter. In this Spark AR tutorial, you will learn how to add grain to your Instagram and Facebook filters. You can see an example of this effect in action by clicking here or by scanning the below code.

Getting grain images
Before we add our grain, we of course need some sort of grain images. For a great source of free grain images, I recommend checking out Film Composite. They have an entire collection of free grain images and videos. Once you find some grain you like, click on the thumbnail to get to the download page. For this particular lens I am going to use film scratch images, but feel free to use whichever type you like. Once you click on the thumbnail, you'll see a larger preview of the grain along with a Blend Mode and Download Free button. Take not of the blend mode because we'll need that later. Download the image and find some more that match it. If you can only find one grain image you like don't worry, we have a few tricks for generating multiple images from one.
Formatting the grain
Using your favorite graphics editor (Photoshop, Affinity Photo, GIMP, etc), create a new image. I would not go above a final resolution of 720x1280 due to file size constraints for Snapchat lenses. Import each of your grain images as a new layer. The more layers you have, the more dynamic and less repetitive your grain will look because each layer will become a separate frame in the animation. Since the grain images we downloaded from Film Composite are much larger than the resolution we chose for our frames, it is pretty easy to supplement our number of frames. Take a layer and scale it down so it still fills the frame. Duplicate the layer and scale, move, and/or flip the layer to make a new, distinct frame. Repeat as many times and for as many layers as desired. Film Composite had six film scratch images, and I duplicated each layer twice to give me a total of 18 frames. Once you have your frames, export each layer as an image. You can do this manually by showing/hiding each layer and exporting, or you can use a more automated route -- here's how to do it in Photoshop, in Affinity Photo, and in GIMP.
Import into Spark AR
Open up Spark AR and start by adding an Animation Sequence and choose your grain frames as the texture. This will import all the images and construct the animation. Next add a Canvas and then add a Rectangle to the Canvas and set its size to Fill Width and Fill Height. Give your rectangle a material and set it to Flat shading and select your animation sequence for the texture. Now just set the overlay mode to what Film Composite had listed for the grain images you used. However, you might run into a problem here because materials in Spark AR don't have many blend modes. If you find something that works, awesome! If not, we can manipulate our grain animation a little using the Patch Editor.
Adjusting the grain animation
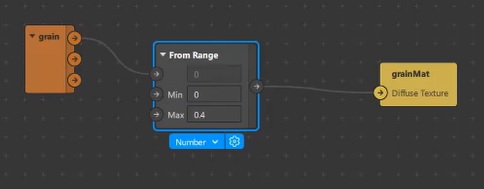
Start by opening the Patch Editor. It can be a little scary working with patches, but we are only going to be doing super simple stuff here. In the Assets Panel, drag your grain animation into the Patch Editor. This should create an orange patch. Now select your grain material and over in the material settings, click on the little circular arrow next to the Texture option. This should create a yellow patch. If you connect the top output of the orange patch (the RGBA output) to the input of the yellow patch, that is the same as just setting the texture in the material settings. But in our case we want to make some adjustments.
The film scratch images I am using have black scratches on a grey background. If I take a look at the exact color values for the grey, I see that the color value is 127 for the red, green, and blue values. Since color values range from 0-255, this puts the grey right in the middle, or put another way, 50% of the way to being white. The film scratch images then only cover 50% of the possible range.
To convert my 50% range to a 100% range, I am going to use the From Range patch so go ahead and add that in. The From Range patch takes an input value and the min and max values that are present on the input. It then maps and outputs the value on a 0-1 scale. Take the orange patch and connect it to the input. Our min value is 0 (black) and max value is 0.5 (grey). If we set those values and then connect the output of the From Range to our yellow material texture patch, you will see the grain images change! Now they will have black scratches on a white background! If the background isn't quite white enough, feel free to change the max value on the From Range patch. I ended up using a value of 0.4. Now you can change the blend mode of the material to something like Multiply and get a much better result. You can adjust the alpha of the material to change the strength of the grain.
You now have a grain effect!

