Selectively apply post effects to a 3D object

The scenario
Let's say you are making a lens where you want to apply a post effect to the user but not to the background. For example, maybe you want the user to be in black and white but keep the background in color. This is pretty straightforward to do using a segmentation texture as a mask.
But now let's say you have some 3D accessory you want to add to the user such as glasses or a hat that extend past the outline of the person. Lens Studio doesn't create masks for 3D objects, so how do you selectively apply your post effect to both the person and the object? The solution is to create our own mask for the 3D object.
The approach
So how do we create a mask for our 3D object? At a high level, we are going to basically make a green screen for our 3D object, use that to create a mask, and then layer everything together. It is not horribly complicated, but there are lots of little details we need to keep track of. Let's get started!
Create the green screen
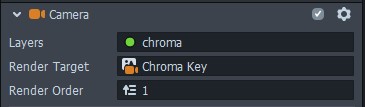
To create a mask for our 3D object, we are going to create a green screen. The exact color we use doesn't matter, so if you have a green object you can use a different color. Start by creating a new Render Target and name it "Chroma Key" or something to your liking. Now create a new camera and also name it accordingly. Set the render target of the camera to the chroma key render target and set the camera to a new layer. Next go to your Scene Config and set the Live Target to the chroma key render target.
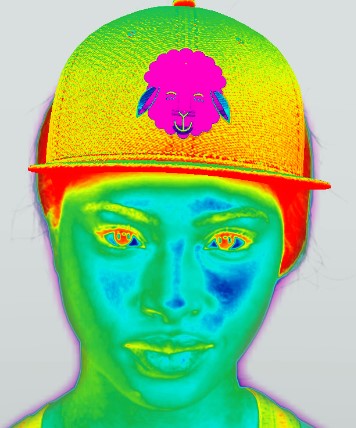
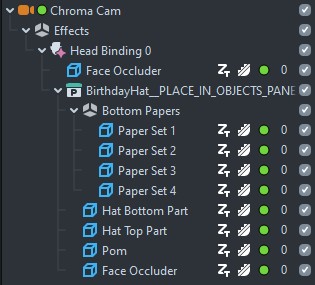
Next we are going to add our 3D model to the chroma key cam. For this tutorial I am going to use the "Birthday Hat" in the Asset Library, but you can use whichever model you wish. After importing your model, be sure to place it under the chroma key camera and change the layer of all your objects to be that same layer. Since this is a hat I also added a head binding.
Now that we have our object in the scene, select the chroma key camera, change the Clear Color Option to "Color," and choose a color that is not present in your object. I chose RGB values of 0, 255, and 0 for a pure green. It's not required, but I also changed the alpha value to 255 to make sure the little color picker icon shows the color I picked in the Inspector Panel. At this point you should see your object against a solid background.
Creating the mask
Now that we have our object against a plain background, let's turn that into a mask. Create a new render target for the mask, create a new orthographic camera with its own layer, then set it to the mask render target. Next update the Live Target in the Scene Config to the mask render target.
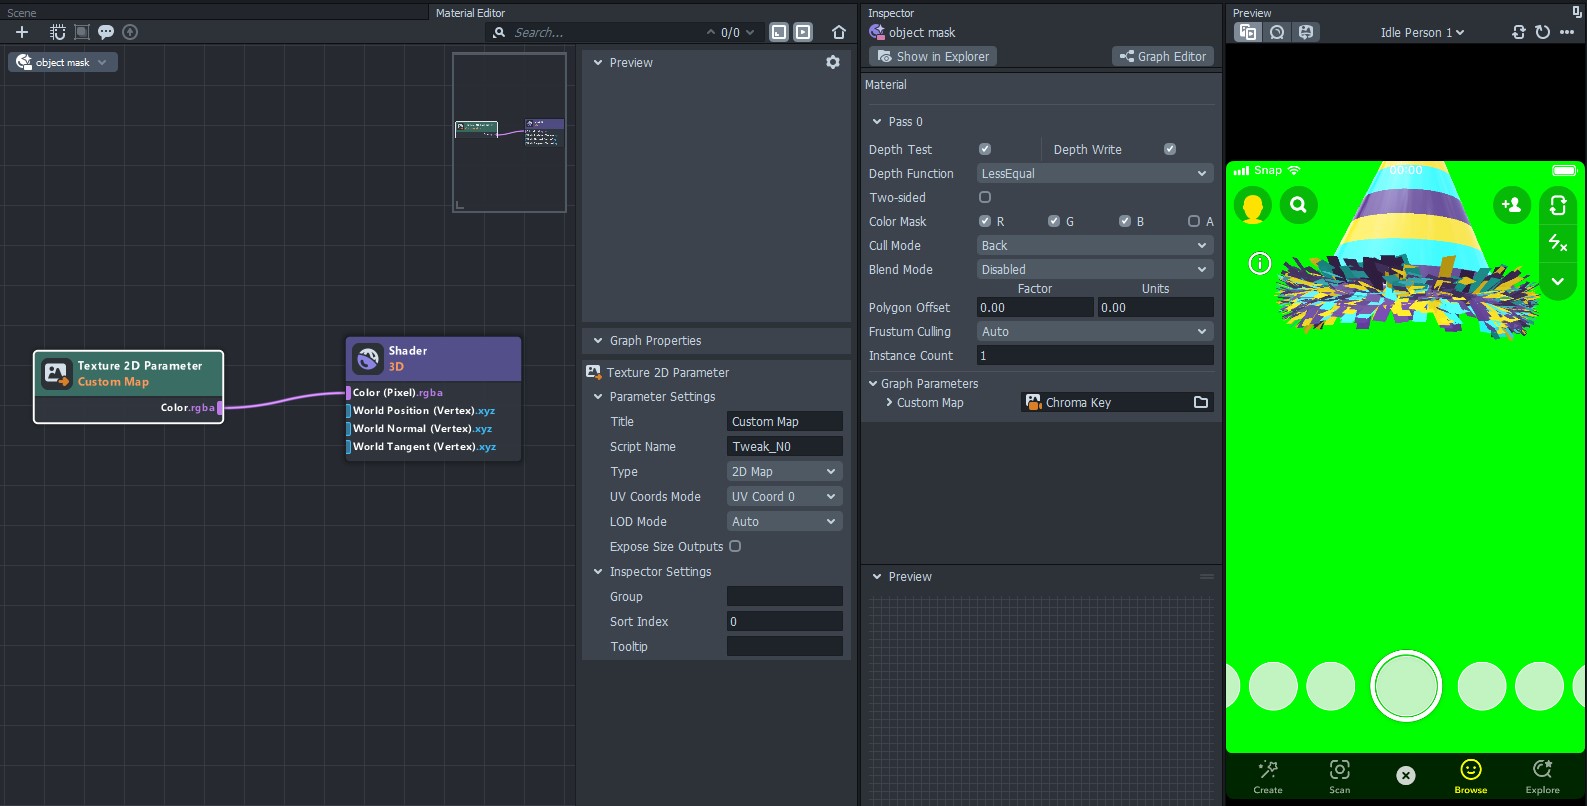
To create the mask for our 3D object, we are going to just check what the color is. If it is green (or whichever color you chose) we'll set the color to black, otherwise it will be white. Let's get started by creating a "Graph Empty" material and naming it "object mask" or something. I like to have a preview of what I'm doing, so before I edit the material I am going to create a new screen image in the mask cam (set it to the correct layer), set it to "stretch," then set the image material to my object mask material. At this point the preview panel should go all white, so let's open up the graph editor and get started on our material.
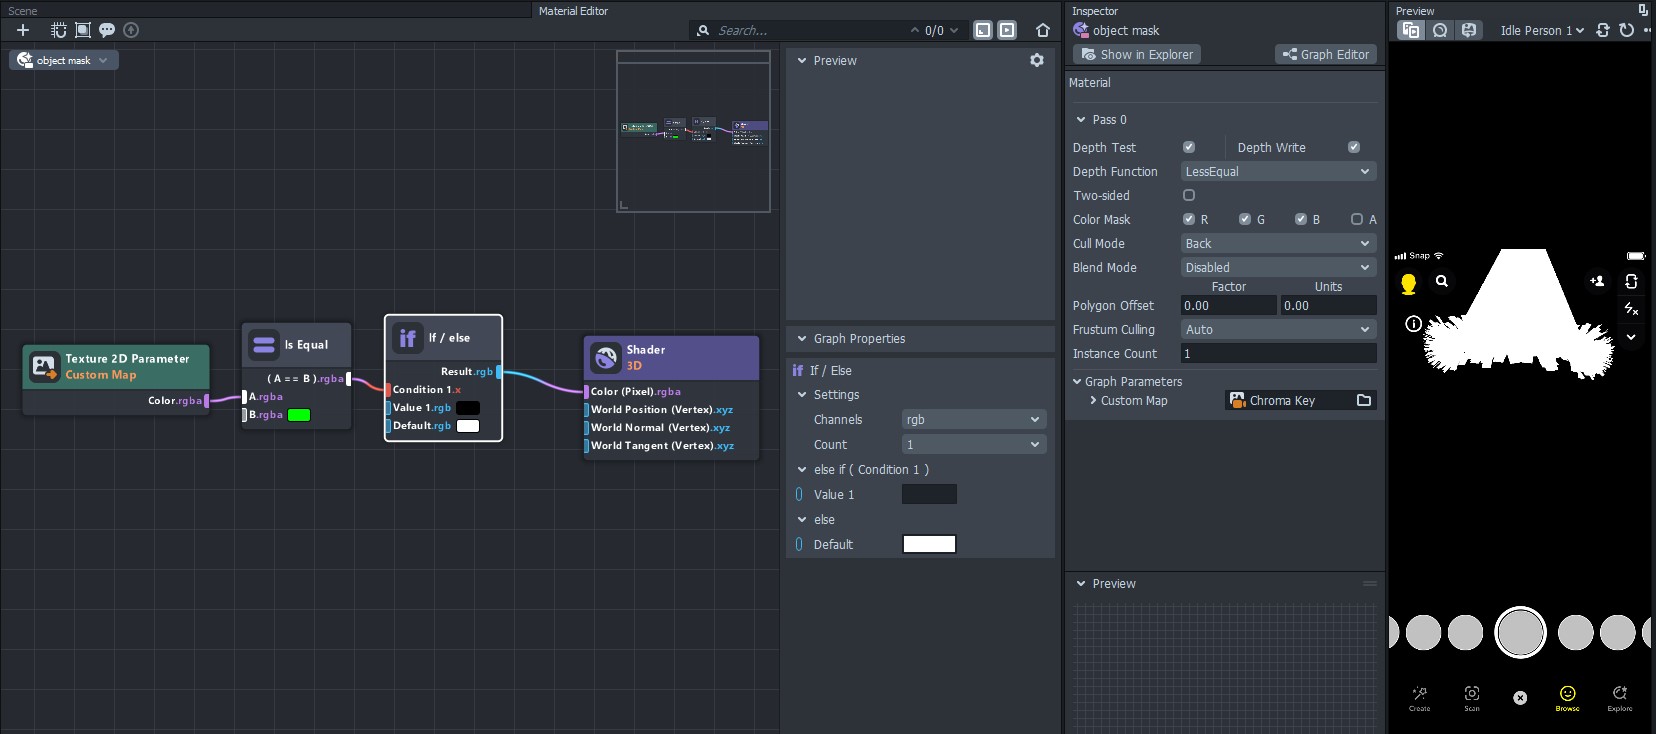
The first thing we need to add is a "Texture 2D Parameter" node. Connect that to the Color input on the Shader node and select the chroma key render target as the input texture. The preview panel should now show you your object against the solid color background.
Now we are going to check what the color is in our image. Add an "Is Equal" node and an "If/Else" node. Connect the texture node to the top input of the Is Equal, the output of the Is Equal to the Condition input of the If/Else, then the output of the If/Else to the Shader. The preview panel will probably go all black, but that's okay, we can fix that.
On the Is Equal node select the same color that you used for your chroma key on the "B" input. Then select the If/Else node, change the channels to "rgb," and change the color on the "else" portion to white. Now you have a mask for your object!
We have our object mask, now we just need to combine it with our person segmentation. Add a new screen image to the mask camera and set the texture to the Portrait Background segmentation texture (or segmentation texture of your choosing). You might need to invert the mask so that the background is black and the user is in white. But now we have a problem, we lost our object mask! No worries, select the screen image with the user segmentation and change the Blend Mode to "Add." Now you have a mask with both the person and your 3D object!
Adding the post effect
Now change your Live Target back to the original Render Target. You should now just see a plain camera view. Select the original camera (the one with the blue dot), and for the layers go ahead and add the chroma key layer; make sure you keep the Default layer enabled. You should now see the hat on top of your user! This is a little tricky, so let's go over it real quick. An object can be present on just one layer. However, a camera can render objects from multiple layers. We have our 3D object on the chroma key layer to setup our mask, but now with the original camera we can include that object without including the solid background. Pretty neat.
Now we can add a post effect. For the sake of the tutorial I am going to add the "Rainbow" color correction so that there is a clear distinction between what does and does not have the post effect applied. But wait, we can see our post effect applied but the hat still looks normal! What is going on? Right now in my scene the chroma cam with my hat comes after the original camera. So the original camera is applying the post effect, and then the hat is being added. All I need to do is drag my chroma cam to above the original camera so that the hat can be rendered to the screen before the post effect is applied.
Use the mask
We could at this point use our mask render target as the camera mask on the original camera. That works for creating this effect, but if you want to also apply a post effect to the background then it gets a little tricky. Let's go over another way to use our mask.
Create a new render target named "comp" for composite or something similar and set that as the Live and Capture targets in your Scene Config. If you add a new Screen Image to your scene, it should also create a new Orthographic Camera. Select your camera and make sure its render target is set to comp. I named my screen image "background" and then I duplicated it and named the copy "foreground." For the background I set the texture to the Device Camera Texture, but if you are wanting to have a separate post effect on the background you can setup a new camera/render target/layer and use that resulting output for the texture here.
For the foreground image we are going to create a new "Uber Unlit" material, set the base texture to the original Render Target, set the Opacity Texture to the mask render target, then set the blend mode to "Normal." Our effect is now finished!