Add dynamic text directly to 3D objects in Lens Studio

Text components and screen text are well known features of Lens Studio. The text texture, however, is lesser known but is a super powerful feature. With the text texture, you can add dynamic text directly to the surface of a 3D object and this tutorial will show you how. You can see an example of this by clicking here or by scanning the snapcode below.

Prepare your 3D object
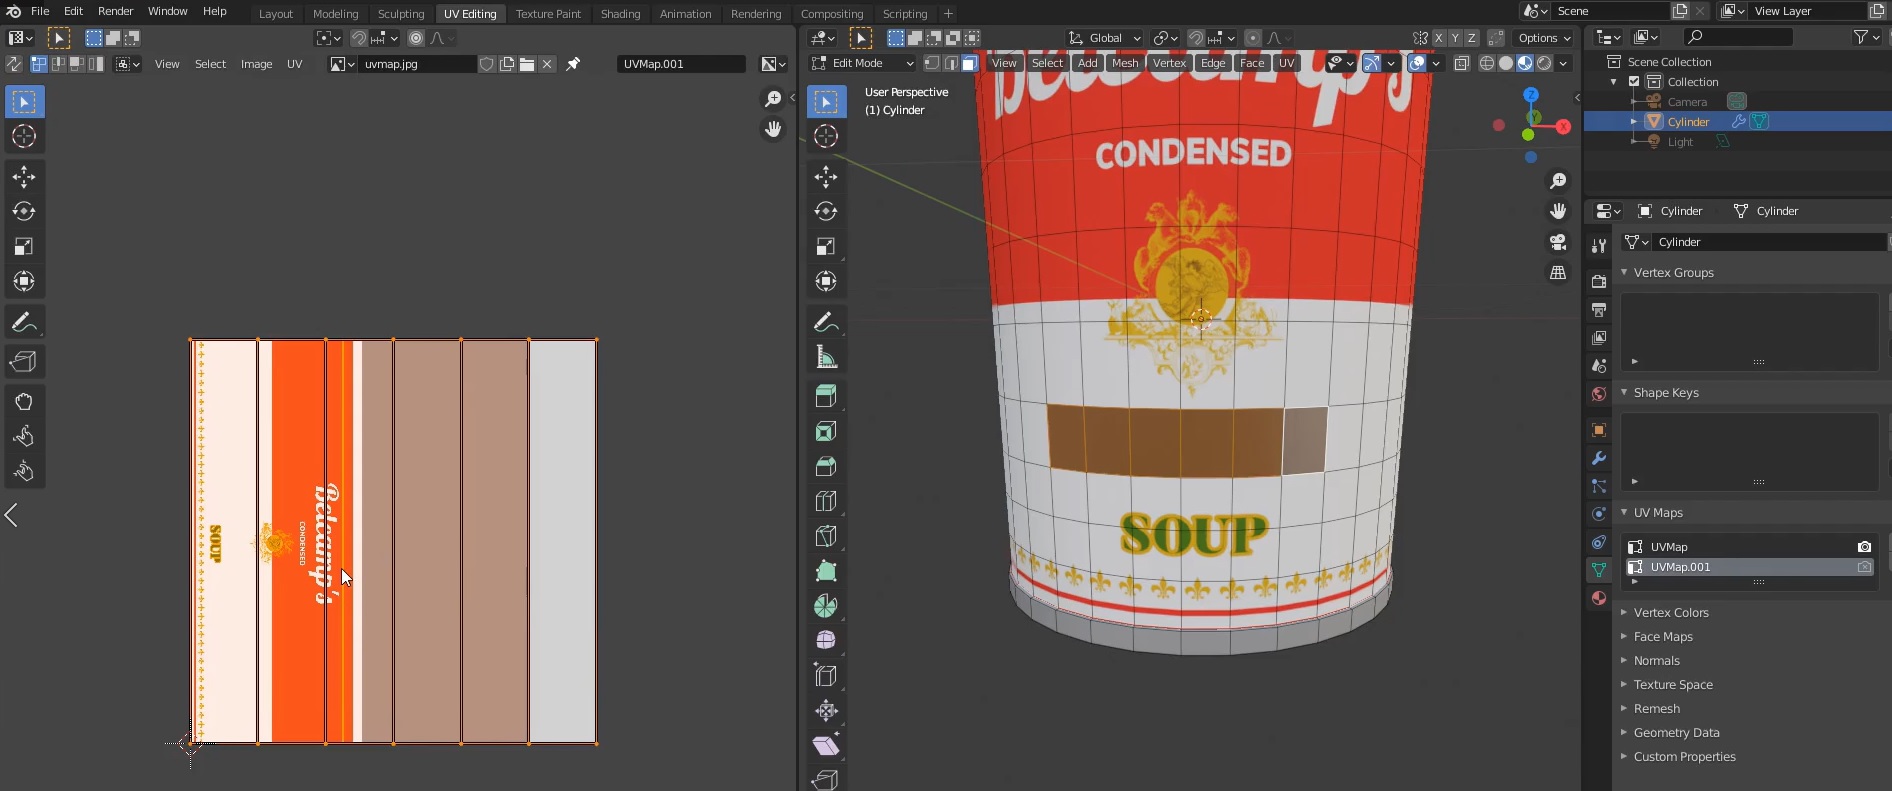
The text texture in Lens Studio is treated as an image texture, and in order to place it onto a 3D object, we need to make sure the UV map is setup for that. I personally use Blender, but feel free to use whatever software you wish.
- Select the faces on your object where you would like the text texture to be placed
- Give these faces a new material
- Create a second UV map for your object
- With just these faces selected, UV unwrap your object onto the new UV map
- Scale the faces in the UV map as desired
- Export your object and import into Lens Studio
Apply the text texture to your object
Heading into Lens Studio, create a Text Texture if you haven't already (in the Resources Panel) and give it some sample text. You also need to make sure your text material is setup. It can be as simple as an Unlit material, or it can be a custom material made with the Material Editor. Assign the material texture to the text texture and then select your model, find the material to be replaced, and replace it with your new material.
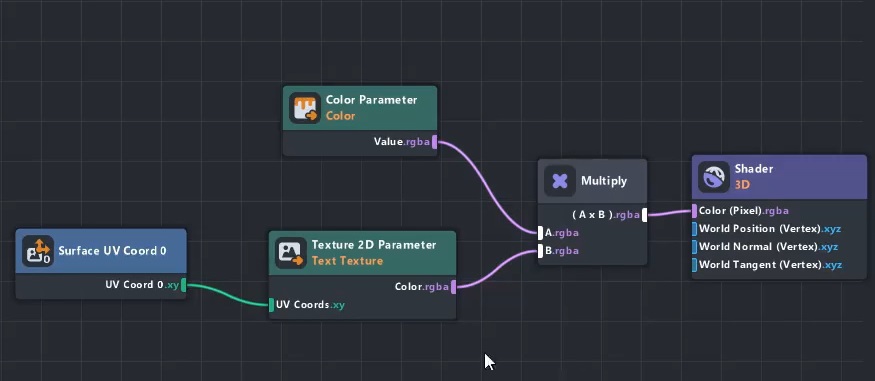
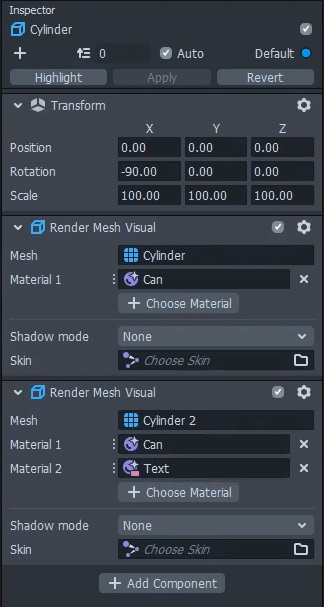
At this point you should see something changed on your 3D model, but we aren't quite finished yet. Currently the text texture material is using the original UV map of the object and so it won't look right. We need to switch that to the second UV map we created. If you are using the material editor you'll need to swap out the "Surface UV Coord 0" for "Surface UV Coord 1," and if you are using a non-graph material you'll need to set the texture UV to "Mesh UV 1." Now you'll be able to see your text, but there'll be empty space around the words. Let's fix that. With the 3D object selected, add another material slot and select the regular material for the object. Then click on the three small dots to the left of the material name and drag it above the text material. Provided your text is a different color than the background behind it, you should now see your text.
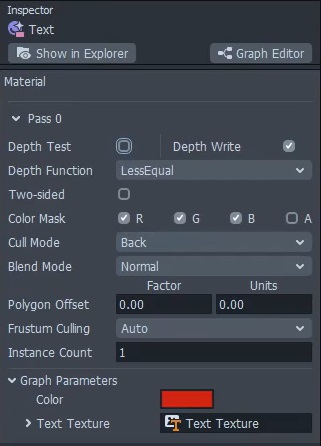
The last issue you might notice is the text and the base material are clashing with each other and flickering over the top of each other. To solve that issue, select your text material and disable "Depth Test" in the Inspector Panel. Now you are good to go!
Text texture caveats
There are a few things to keep in mind with the text texture. First, the "Outline" and "Drop Shadow" features of the text do not work. Second, the text is stretched to fit the bounds of the UV map you defined in your 3D software. This is usually only noticeable for really short or really long strings of text. You can compensate for this by scaling the UV and then clamping it to get rid of the tiling, but this will cause banding with some letters (especially common with the letter "y" in my testing). Depending on your font, this approach may or may not work. If it does work for you, you can write a script to adjust the X and/or Y UV scaling based on the length of the text. For a slightly more in depth view of the material setup for that, watch the video version of this tutorial on YouTube.
Making it dynamic
If we wanted some set text on the model, it would be immensely easier to set it up with the original texture for the material. The real power of the text texture is our ability to modify it via a script. This is super simple, just import the text texture as a texture asset and set the right property. With normal text components and screen text you directly set the "text" property, but with the text texture you do it through "control.text" instead. The below code snippet sets the text texture to the user's Display Name.
// @input Asset.Texture mainText

global.userContextSystem.requestDisplayName(function (displayName) {
  script.mainText.control.text = displayName.toUpperCase();

  // Uncomment the below line when creating the preview
  // so it doesn't get flagged for having the word "Snap"
  // in it. Then comment this line again when you submit.
  // script.mainText.control.text = "YOUR NAME HERE";
});