Make your own color correction filters with LUTs

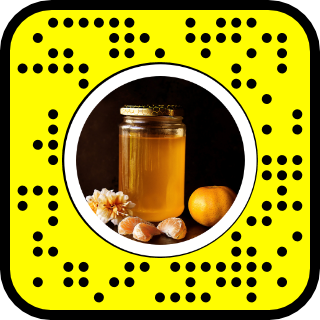
Color correction filters using LUTs (lookup tables) are super popular. Color corrections can be used to enhance the look and feel of a complex lens, or they can be used as standalone filters. LUTs are usually created using Photoshop or Lightroom, but for this tutorial we'll be using the freely available Photopea. You can preview an effect using a color correction by clicking here or by scanning the snapcode below.
What is a LUT?
You may have heard the term "LUT" used a lot in relation to Snapchat lenses/filters, but what is a LUT exactly? The word LUT is actually an acronym for "LookUp Table" and they are used to transform color values and give a certain "look" to the final product. The LUT takes the input image/video and transforms the colors by using the LUT as a reference. In film and video editing, LUTs are used during the color grading step to achieve a specific look for the video. In photography, specific looks are saved as presets that you can quickly apply to many photographs later (like an Instagram filter). Rather than making the same edits many times, the LUT is a shortcut to quickly make the same color changes to multiple images or videos. If you want to learn more, you can read more here about LUTs. It is important to remember that LUTs are only transforming the colors; they cannot be used to add grain, blurring, sharpening, etc.
Creating LUTs
So how do you make your own LUT? Lens Studio actually already has quite a few built-in LUTs that you can layer together to create your own look, or you can create your own. There are already some excellent tutorials out there covering how to create LUTs using VSCO, Photoshop, and Lightroom, so if you use one of those programs I recommend you check out those tutorials. In this tutorial we will be using Photopea, a free, online image editor that shares many features with Photoshop. Let's get started.
Get the base lookup table
LUTs come in various file formats, but Lens Studio cannot read all those various files. Instead, we will be applying our color corrections to a neutral lookup table and then importing our modified version into Lens Studio. Head over to the Lens Studio page on Post Effects and download the Base Lookup Table image. You will start with this file anytime you want to create your own custom LUT for Lens Studio.
Get some reference images
Applying our color corrections only to the base lookup table is not ideal because we won't be able to really see how our filter will look in Snapchat. Fortunately we can apply our changes to both the base lookup table and some reference images at the same time to see how everything is looking. Now remember, people are going to be using your color correction inside of Snapchat, so don't download a bunch of professionally edited photos to use as references. I recommend taking a couple selfies with Snapchat and supplementing with selfies from friends or from the web. A good place to find selfies is kaggle. Kaggle is a website that runs machine learning competitions. The nice thing for us about machine learning is that it requires a lot of data. There is a good selfie dataset that you can browse through for some reference images. You don't need to download the whole dataset, just right-click and save a few of the images (you can click "Load more" at the bottom of the images to keep looking for good selfies). You won't know when or where people will be using your lens, so try to get a variety of lighting conditions and a mix of skin tones. I've seen a LUT which gives fair-skinned people a tanned look turn dark-skinned people orange. You want your lenses to be inclusive, so definitely include some dark and light skin tones in your reference images.
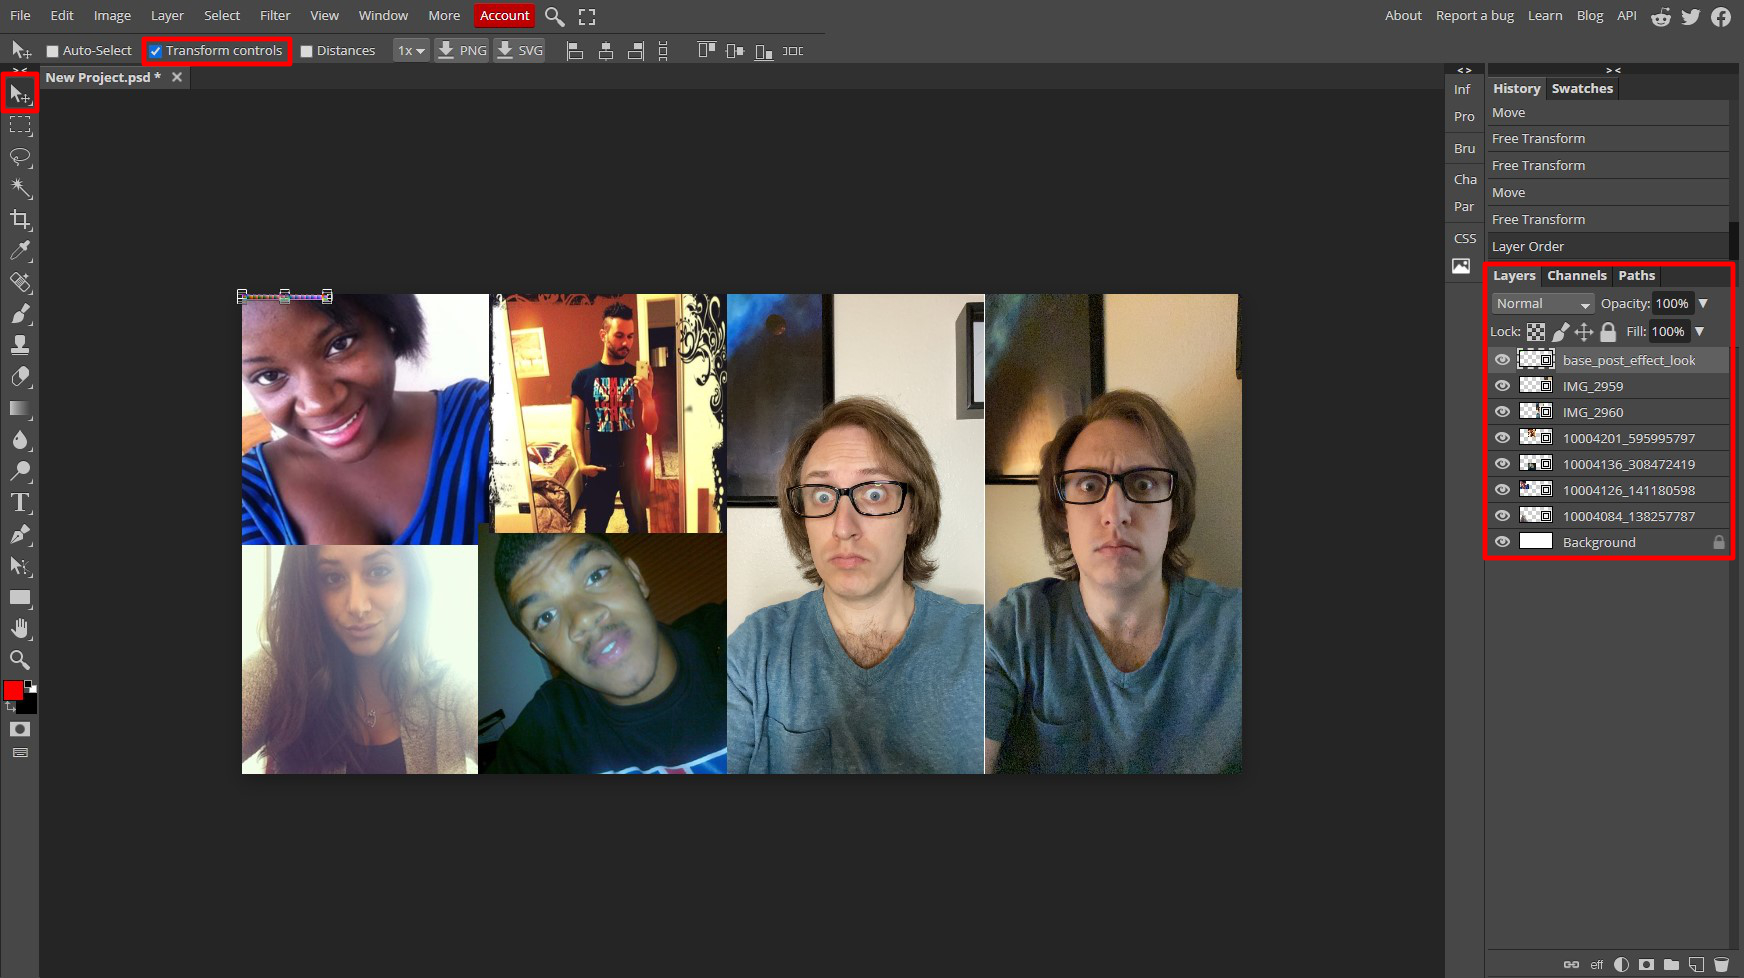
Load your images
Open up Photopea and create a New Project. Photopea won't be able to save your work (unless you pay to upgrade), but you can export the Photoshop file (.psd) and import it later if you ever need to make changes - be sure to always export your edits before closing Photopea. The size of the project don't really matter, you just want to have enough room for your reference images. I went with a width of 3000 and height of 1440. Once you've created the project, go to File -> Open & Place and select all your reference images and the base lookup table. Use the Move tool (you may need to enable the Transform controls) to arrange all your reference images. Place the base lookup table in the top left and do not resize it - this will make our lives easier in a bit.
Make your adjustments
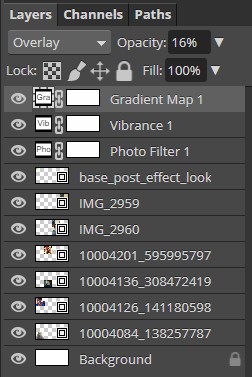
To create our LUT, we are going to use Adjustment Layers. An adjustment layer is a non-destructive edit. What I mean by non-destructive is we aren't actually editing the individual pixels. Instead, we are essentially adding a filter to our image that does some transformation. The nice thing about adjustment layers is we can add, remove, and edit them as we see fit at anytime. Both Photoshop and Affinity Photo have adjustment layers so feel free to use those rather than Photopea if you have them. However, GIMP currently does not have adjustment layers so I do not recommend using it to create LUTs. We are using Photopea for this tutorial because it is freely available online.
To add an adjustment layer, click the half-filled circle icon beneath the Layers panel. You won't want to use any of the "Fills" at the top of the menu, but basically anything else can be used to create your LUT. Explore the various types of adjustment layers and play around with their various properties, blend mode, and opacity. The great thing about the adjustment layers is that they affect everything below them, so you will see your changes applied to all the reference images you imported. If you aren't seeing this, make sure your adjustment layers are at the top of the layer list in the Layers panel.
Exporting the LUT
Now that we have our finished effect, it is time to export. First things first, go to File -> Save as PSD to make sure you have the edits for later if you ever need to make changes. Now we need to export just the base lookup table. If you go to the File menu, there is an option to export our layers. Unfortunately this method does not apply our adjustment layers. But there is a way to export what we need.
Start off by selecting all the adjustment layers and the layer with the base lookup table in the Layers panel and then click on the folder icon down at the bottom. This will put all the adjustment layers and the base lookup table in a folder.

Right click on the folder and select "Duplicate Layer" and then right click on the new copy and select "Convert to Smart Object." The smart object bundles all our adjustment layers with our base lookup table. Now that we have the smart object, double click on the layer thumbnail in the Layers panel.
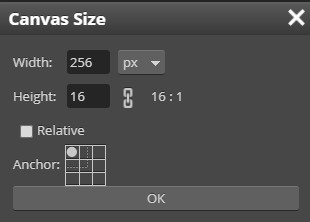
After double clicking on our smart object, we will now have a brand new project with our base lookup table up in the corner. If you look in the Layers panel you will see a folder containing the adjustment layers and the base LUT. All we have to do now is resize our image. Go to Image -> Canvas Size and set the width to 256 and the height to 16. In the Anchor box click on the top left corner and then click OK.
Now that our image is the right size, go to File -> Export as -> PNG to save your LUT! Make sure you export as PNG, otherwise you may have issues inside Lens Studio.
If we go back to the original file with our reference images and adjustments, you can now delete the smart object layer - unless you renamed things, it will probably be named "Folder 1 copy." If you need to make any changes to your LUT, you'll just have to go through the same steps of converting the folder with the adjustments and the base LUT to a smart object, resize the canvas, and then export it as a PNG file. The process is a lot easier in something like Photoshop or Affinity Photo, but Photopea is free so I'm not complaining.
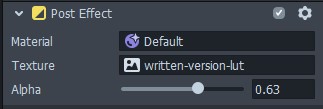
Use your LUT in Lens Studio
Head on over to Lens Studio and import your exported LUT. In the Objects Panel, add a Color Correction and select "Empty" (technically you can add any color correction). Swap out the Texture on the color correction for your imported LUT and you are good to go! You can adjust the strength of your LUT by adjusting the Alpha slider on the color correction. Go through the various preview videos as one last check to make sure your LUT looks good and you are all set!