How to make a twerking lens for Snapchat using Mixamo and Lens Studio
If you haven't made some sort of twerking lens, can you still call yourself a lens creator? Not to worry, we'll go over everything you need to know in this tutorial! All it takes is a 3D model, Mixamo, and a Lens Studio template. You can preview an example twerking lens by clicking here or by scanning the snapcode below.

Prepare your 3D model
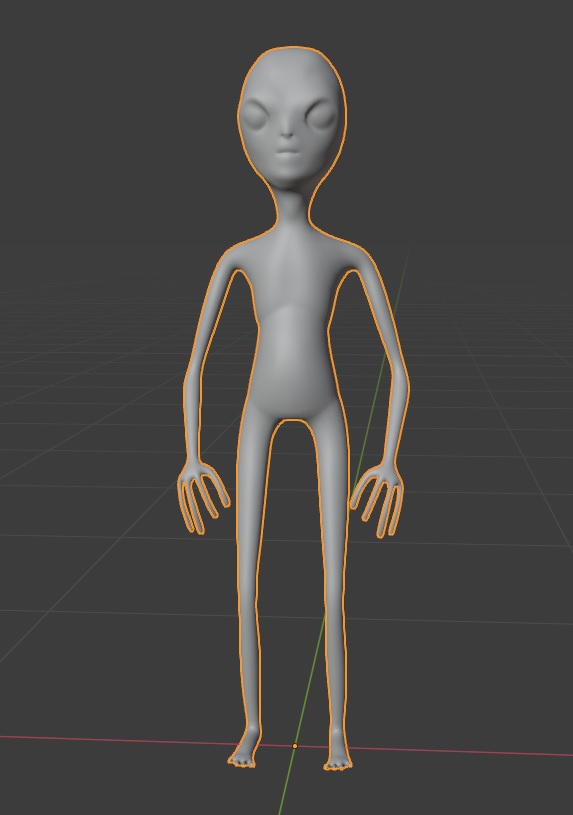
First things first, you need a 3D model. For this tutorial it does need to be humanoid (standing upright on two legs), so unfortunately no twerking deer (unless they are standing up). Ideally your character should be standing in a T-pose with their arms outstretched, but it's not strictly necessary. Feel free to model/sculpt your own character, or you can find/buy a 3D model from somewhere like TurboSquid or Free3D. Make sure your model follows the Lens Studio guidelines for 3D models and then export or download it in fbx format.

Add the animation
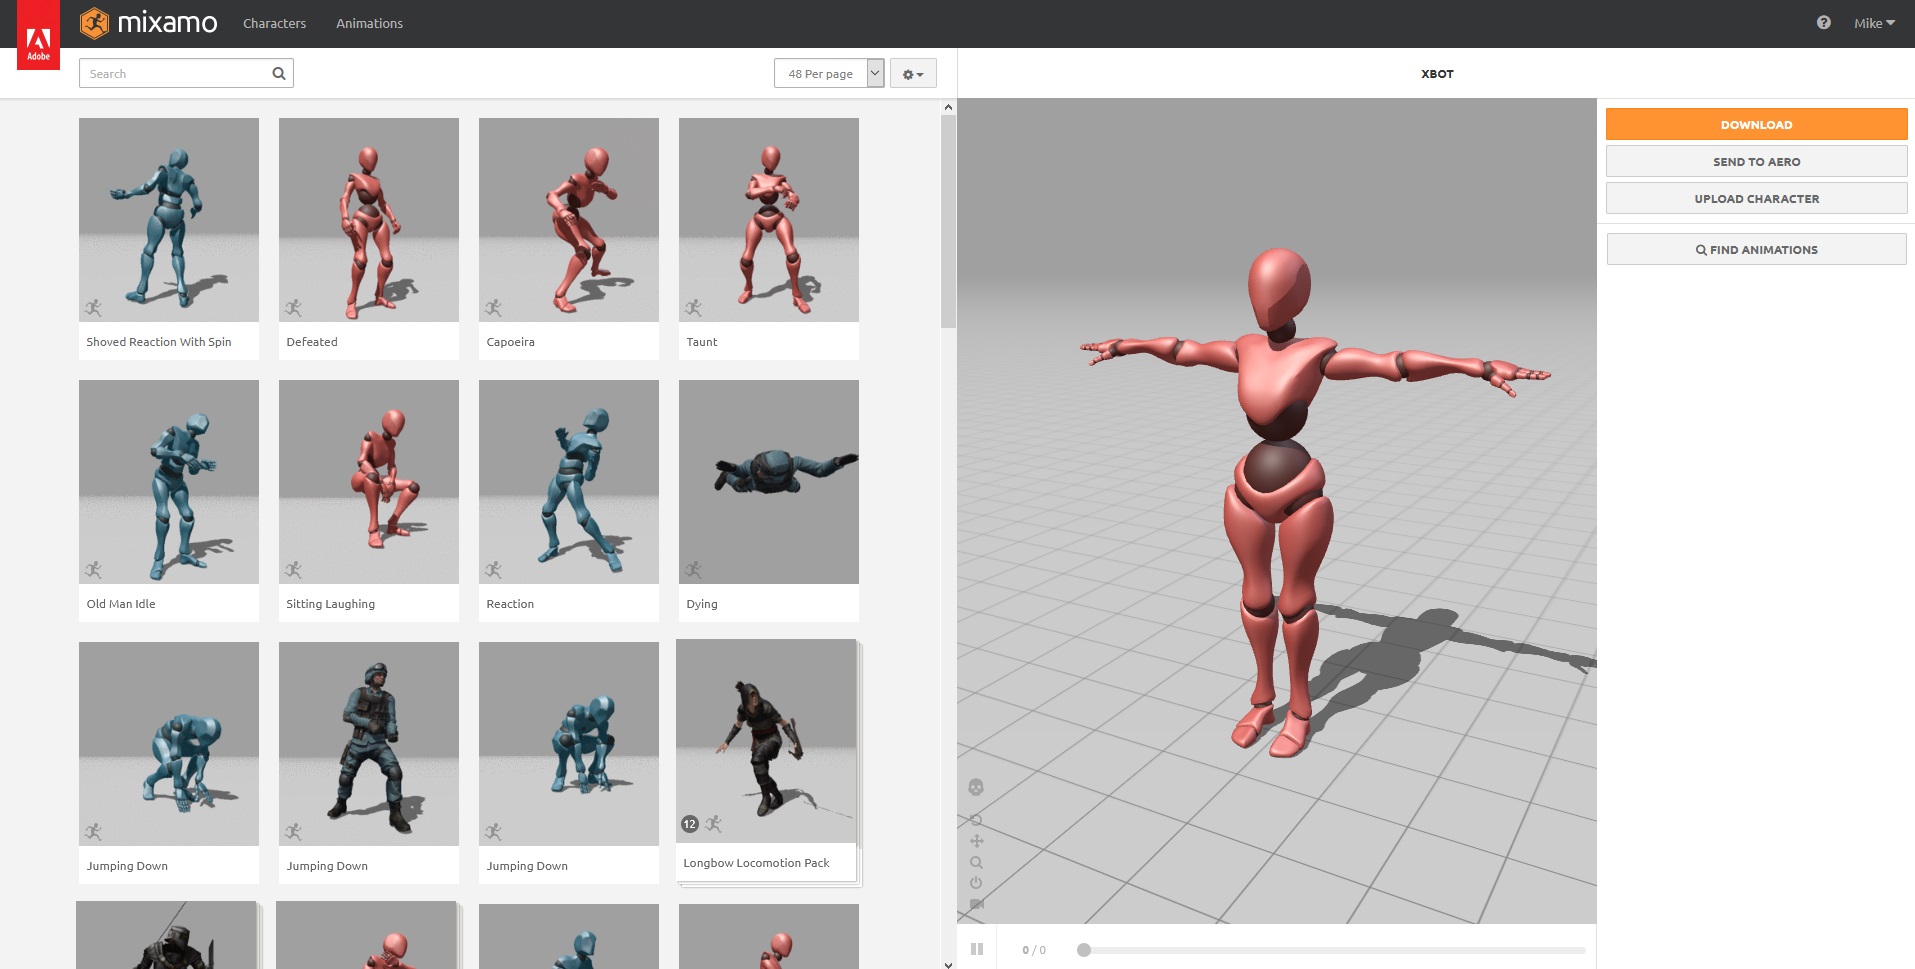
If you know how to animate you can create the twerking animation yourself. But if you're like me, head on over to mixamo.com and create a free account. On the left side of the screen you'll see a variety of animations, and on the right side of the screen you'll see a preview. When you first login the preview will probably just be standing still, but if you select an animation on the left it will start playing.

To the right of the preview there's an "Upload Character" button. Click it and select your 3D character that you exported. Mixamo will load in your character and walk you through some steps to prepare it for the animation. If all goes well you will see your 3D character looking around and you can complete the setup wizard. Now any animation that you select on the left will be applied to your character.
If you search for "twerk," a single result should show up. Click on it to apply to your character. You might notice that your character's hands are going through their thighs while twerking. You can fix this by adjusting the "Character Arm-Space" setting on the right. Once you are happy with how it is looking, click the "Download" button to download a new fbx file with the animation.
Adjust the animation
As is, everything is fine to import into Lens Studio. But the animation does include more than just the twerk, so let's take a look at how to trim our animation. The original Mixamo animation loops, but a trimmed version won't loop so we will have to do a little extra work.
Open the twerking animation in your 3D software of choice. Find a good beginning and end frame for the animation so that you capture most of the twerking and where the end frame is similar to the first frame. For this twerking Mixamo animation frames 173 to 323 seem to work pretty well. There is a jump when we start the animation over, so let's smooth that out.
Go ahead and delete some of the keyframes outside of your twerking frames to give yourself a little room to work. Extend your animation range up to frame 326, and then copy the first keyframe (frame 173) and put it on frame 327. By duplicating our first keyframe and placing it just after our animation ends, we are making sure we transition back to the beginning of the animation and make it loop. The small delay before we hit that first keyframe again helps to smooth out the transition and make it less jarring. Feel free to play around with your starting/ending keyframes until you get something you like.

Import into Lens Studio
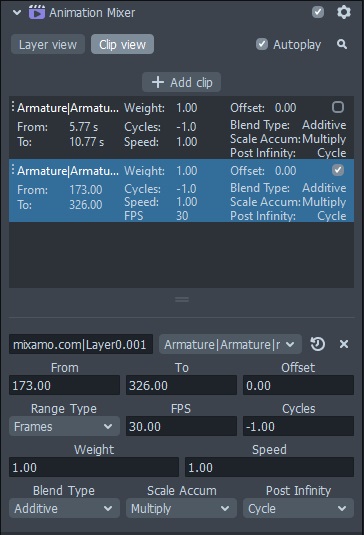
Now that we have our looping twerking animation, export it as an fbx file from your 3D software and head over to Lens Studio. Rather than start a project from scratch, look for the "Animated Object" template and open that up. Remove the Red Panda object and replace it with your character. You might notice some really weird things going on, but don't worry, we'll get it fixed. If you notice a really weird animation, there could be multiple animations in the file (this will sometimes happen if you reuse a 3D model). Select your 3D character, and then in the Animation Mixer, disable all the other animations. The bottom animation is probably the one you want. The entire, untrimmed animation might also be playing. Change the Range Type to "Frames" and then select the start and end frames of the animation we just looped.

Finishing touches
Once your have your animation working, all that's left is to adjust the scale of your character, make sure the materials are looking good, and then add in the shadows. To add the shadows, select the mesh in the Objects Panel and then change the Shadow Mode to "Caster" in the Inspector Panel.
