Tap to change the background in Lens Studio

In this Lens Studio tutorial we'll go over how to create a virtual background or green screen effect for your Snapchat lenses. You can preview this effect by clicking here or by scanning the snapcode below.
Setting up the scene
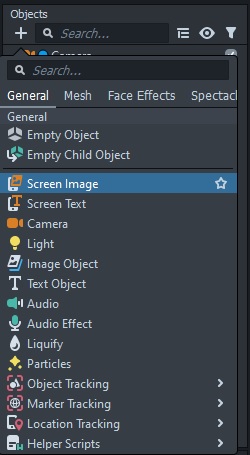
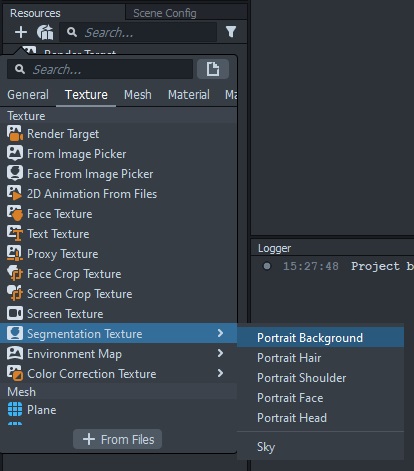
For this effect we are going to start with a blank project. We don't need too much to create this effect. Start by adding a Screen Image in the Objects panel and then a Portrait Background Segmentation Texture in the Resources Panel.
Things are going to look a little weird now over in the preview panel. When we add a screen image, Snapchat adds a placeholder image to let us know it is there and ready for us to edit. For this lens I am going to use space backgrounds, but feel free to use whatever you want. Pixabay is a great place to find free-to-use images. Head on over and download 3-4 images that you like. Keep in mind that our lens has an overall size limit of 4 MB, so we need to be conscious of image size. Fortunately Pixabay provides each image in several different resolutions, so when you download each image, try to find a size around 1280x720. This strikes a good balance between image quality and file size. Once you have your images, import them using the Resources Panel.
Creating the green screen effect
Now that we have our images downloaded and our scene elements added, let's get the green screen effect created. In the Objects Panel, click on the Screen Image that we added earlier. You'll notice that it is nested under a Full Frame Region which itself is nested under an Orthographic Camera. A screen image is 2D only, there is no concept of depth, so it has to be added to an Orthographic Camera which is essentially a 2D only camera.
Go ahead and click on the Screen Image, and then over in the Inspector Panel, click on the Texture box and choose one of the images you added. You should now see your image overlaid in the preview.

You'll notice that the image doesn't fill the whole screen, nor is the person fully visible. Let's fix that. A few rows beneath where we set the screen image texture you'll see a dropdown for the stretch mode. The default stretch mode is "Fit" which ensures our entire image is visible without stretching it in any direction. We are going to change it to "Fill" so that the entire screen is filled. The Fill mode will scale the image without causing any stretching. As an added bonus, it will work on any screen size, so even if someone uses this lens in Snap Camera on the desktop, our virtual background will look good and have no distortion.
Now that our background image is filling the screen, let's make sure we can see the person! Remember that Portrait Background Segmentation we added earlier? Segmentation is a fancy word for outlining, and the Portrait Background type lets us separate people from the background. Click on the Orthographic Camera in the Objects Panel, then in the Inspector Panel click on the "Mask Texture" box and select the segmentation texture. Voila! It's working!
The S-word
Our lens is pretty cool with the virtual background, but wouldn't it be cooler if we could tap to cycle through the different images we downloaded? You would think there would be something built in for this, but unfortunately there isn't. This brings us to scripting.
If you aren't already a developer, scripting can be pretty confusing. Don't run away yet, we're going to walk through the process step-by-step. It's possible to make lots of awesome lenses without writing any code, but it is definitely something you'll want to learn more about if you want to take your lenses to the next level. Let's get started.
Add a script
Adding a script to your lens is a two step process. First we create a script in the Resources Panel. Once you've done that, we need to add it to our scene. With the Orthographic Camera selected, click on the "Add Component" button in the Inspector Panel. It'll be underneath the last item in the panel. Select "Script" and then click on the "Add Script" button. Choose the script we just created and we are ready to move on to the next step!
Set the inputs
Now that we've added our script to the scene, let's write some code so it actually does something. Select the script in the Resources Panel, then back over in the Inspector Panel click on the "Open in" button and choose "Open Built-in Editor." Now we'll see a blank code editor in the main window.
The first line in the code editor will look like the following:
// -----JS CODE-----Any line that starts with // is a comment line and won't actually run. It's a handy way to leave notes to help you (and others) know what specific parts of the code do. The JS CODE part is letting us know that our lenses can run JavaScript (not to be confused with Java).
To change our background, we need to tell Lens Studio what image we want to change, and also provide it a list of images to cycle through. To do this, Lens Studio lets us write special comment lines with @input to let us specify custom inputs. Let's add the following two lines to our script:
// @input Component.Image background
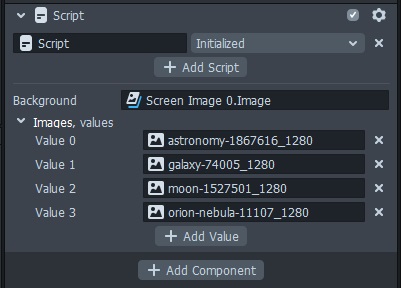
// @input Asset.Texture[] imagesLet's break this down. Component.Image is going to refer to our Screen Image that we added. The Asset.Texture[] part is going to let us input a list of images - the [] part means we'll be inputting a list rather than just a single item. This will be a little easier to understand in just a moment. Hit ctrl-s or cmd-s to save the script, then click on the Orthographic Camera again and look at the script component we added in the Inspector Panel. You'll now see a box to specify a Background image and a place to add values to our Images list. Go ahead and select the Screen Image for the background and your various images for the Images list.
Detecting taps
Okay, now back to our script. Select our script again in the Resources Panel to go back to the code editor. Now that we have our background and images, we are ready to start cycling through them!
The first thing we need to do is detect when the user taps on the screen. Add the following code to your script:
script.createEvent("TapEvent").bind(function () {
  print("Tap!");
});
There's a lot going on here, so let's step through it. Lens Studio has a special script object that we can use to interact with the lens. The createEvent part is a feature that the script object gives us, and in our case we are interested in being notified about the TapEvent. The bind part means when there is a "TapEvent" that we want the following function to run. A function is a reusable block of code. If you click inside the Preview Panel, you should see the word 'Tap!' printed out in the Logger Panel when you click. If so, awesome! If not, double check to make sure you don't have any spelling errors anywhere.
Cycle through the images
So we have a script and we can detect when someone taps the screen. How do we change the image? You are going to add a couple lines of code so that your full script looks like this:
// -----JS CODE-----
// @input Component.Image background
// @input Asset.Texture[] images

var index = 0;
script.background.mainPass.baseTex = script.images[index];

script.createEvent("TapEvent").bind(function () {
  print("Tap");
});
What in the world is going on? Most programming languages count through lists starting at 0, so we are creating a variable to keep track of our list position and setting it equal to 0. Next, we are using script.background to access the background image we selected and setting the image texture to the first image in our list of images that we selected. How do we know that's how we set the texture? Fortunately, Lens Studio has some incredibly helpful reference pages for scripting which is how I knew to use the mainPass.baseTex part. Don't worry if this all looks like gibberish. Scripting takes time to learn.
Now we are going to add a couple lines inside our Tap Event code.
// -----JS CODE-----
// @input Component.Image background
// @input Asset.Texture[] images

var index = 0;
script.background.mainPass.baseTex = script.images[index];

script.createEvent("TapEvent").bind(function () {
  index += 1;
  script.background.mainPass.baseTex = script.images[index];
  print("Tap");
});
Here I just copied the same line of code that we used to set the background image, and above it we are incrementing the index by 1. The += part means take the current variable value and add 1 to it. Now if you click in the Preview Panel, you should start cycling through your different backgrounds. But wait! What happens when you get to the end? Our index keeps increasing, but our list is all out of images so we get a nasty looking error in the Logger.
To take care of this, we'll just reset our index to 0 whenever we go too high. Let's add a few more lines of code:
// -----JS CODE-----
// @input Component.Image background
// @input Asset.Texture[] images

var index = 0;
script.background.mainPass.baseTex = script.images[index];

script.createEvent("TapEvent").bind(function () {
  index += 1;
  if (index >= script.images.length) {
    index = 0;
  }
  script.background.mainPass.baseTex = script.images[index];
  print("Tap");
});
If our index value ever increases to the length of our images list, we set it back to 0 and we go back through our images. Now if you click in the Preview Panel, you'll jump back to the first image after you get to the last image. Congratulations on making it this far! You are all done scripting!
The really nice thing about this script is that you can reuse it in other projects. If you have another lens where you need to tap to change the background, you can simply copy the script to your other lens, add it to your scene, and then select the corresponding Screen Image and list of images.
Finishing up
Now all that's left is naming your lens and creating an icon and a preview. Scripting can be daunting for beginners, but even simple scripts can add some pizzazz to your lenses and help them stand apart.