Make your own Potato Boss style lens for Snapchat and Snap Camera

In this tutorial we'll go over how to create a "Potato Boss" style lens using Lens Studio. We'll go over how to add some wobbly motion to a 3D object and how to set up the background image so that it looks good on any screen size. You can see an example of this type of effect by clicking here or by scanning the snapcode below.
Background
The Potato lens was created by Phil Walton and it went mega-viral after someone shared a picture on Twitter of their boss who got stuck as the potato during a work call. That turned the Potato into a cultural phenomenon. Phil's Banana lens, which is the same style of lens as the Potato, was used on SNL. He unfortunately never received a shout-out from either the original meme nor from SNL, so let's show him some love and go subscribe to him on Snapchat at the very least.
This style of lens is a signature look of Phil, so I asked him if it would be okay to make a tutorial about recreating the effect. Being the nice guy that he is, he said yes.
Preparing your assets
You don't need much to create this type of lens. The two main ingredients are a background image of some sort and a 3D model. The 3D model can be as simple or complex as you like, the only condition is that it has some sort of rig. For my lens I am going to use a model of a peanut that I found. For the rig I added only two bones - the main root bone is at the top of the model and my second bone (the one I want to control the wobble with) is at the bottom of the model. If you haven't rigged before, feel free to look up a tutorial for whatever 3D software you are using. As you can see you don't need a complicated rig, so the setup should be pretty easy.
Don't create another potato lens. That lens already exists and was done very well. I recommend using some other 3D object. Whether you find an existing model or create your own, there are plenty of things to choose from. If you absolutely must make another potato lens, make sure it is distinct and add your own personal flair to it.

Setting up the scene
Once you have your assets ready, open up Lens Studio. Start off by importing your 3D model and background image. Then add a Head Binding, delete the Face Occluder, and attach your 3D model to the Head Binding. Scale and position your model as needed.
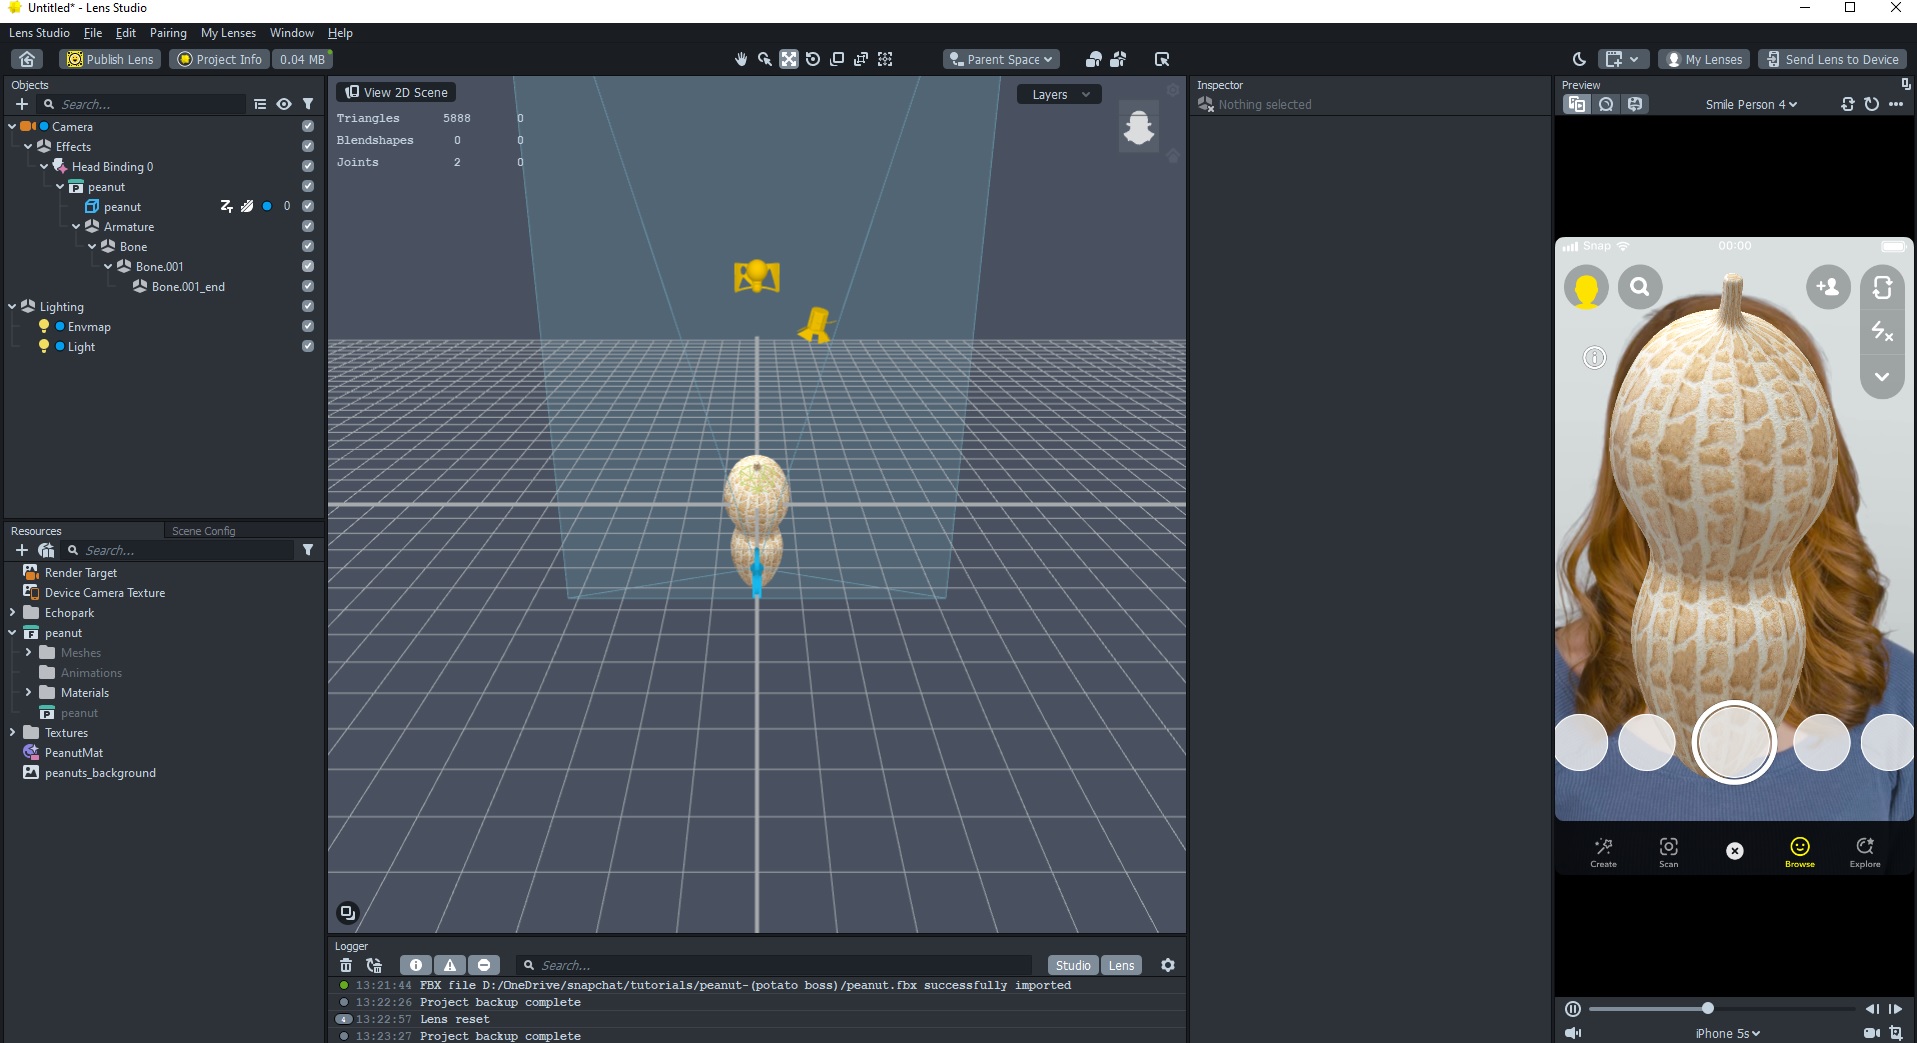
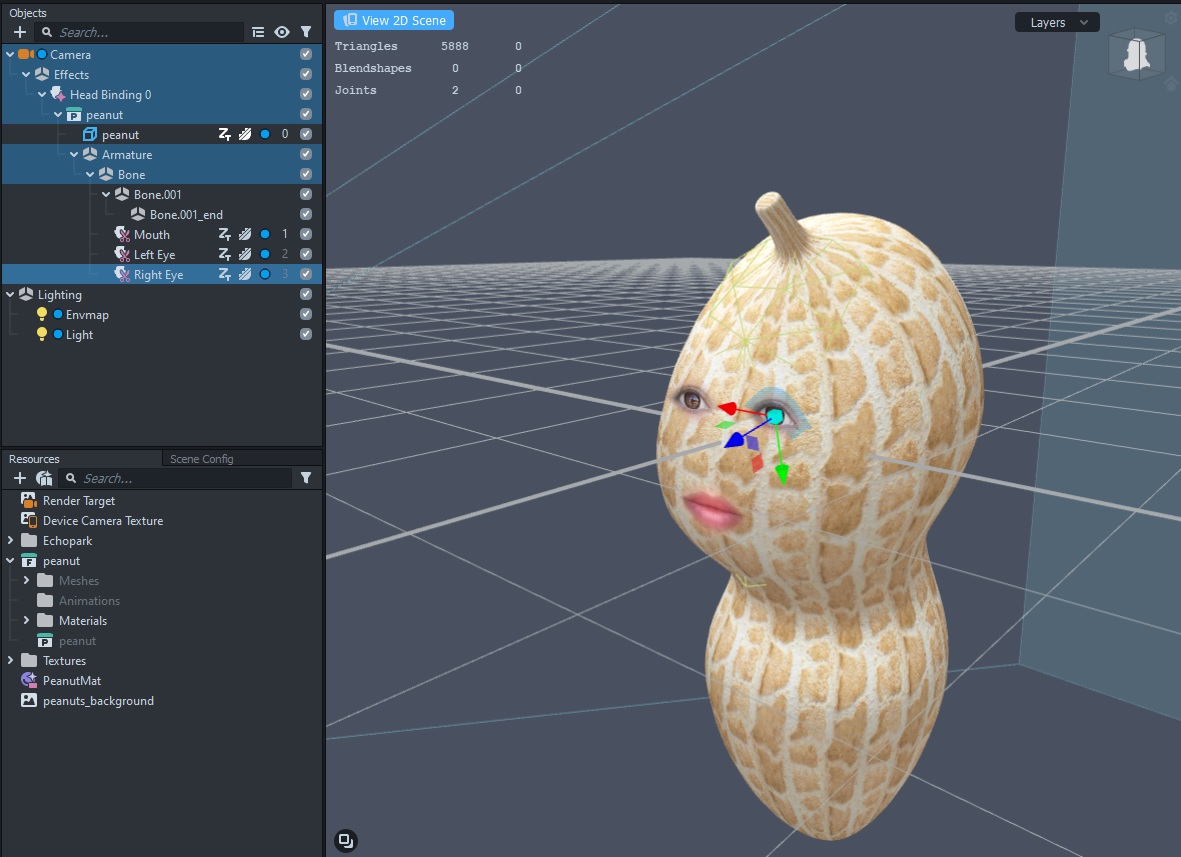
Now that we have our model imported, let's add the eyes and mouth. Add a Face Inset and make sure that Face Region is set to Mouth. You can use the 2D view to position the mouth, but then be sure to switch to the 3D view to adjust the face inset in the Z-direction. Adjust the mouth to be right near the surface of your 3D model, otherwise it will look funny when the user turns their head. In the Preview Panel, I like to use the "Smile Person 1" or "Smile Person 4" previews whenever head motion is involved because they both turn their heads from side-to-side in the video.
When you add a face inset, a new Face Inset Binding is created and the face inset is attached to that. Since we are placing the face insets on our model, we don't need that face inset binding. Drag the mouth inset so that it is a child of your model's root bone (the very first bone in the rig) and then delete the face inset binding. Now duplicate the mouth face inset and change the region to Left Eye. Now, a quirk of Lens Studio is that the left eye inset is actually the user's right eye. The name comes from being on our (the creator's) left hand side. Position it just as you did the mouth, being sure to switch to the 3D view to adjust the Z-direction. Once that is done, duplicate it once more, change the region to Right Eye, and position it accordingly.
Adding the wobble
So far we have our 3D model with the face setup, but it wouldn't be a Potato Boss style lens without some of that wobble/lagging motion on part of the model. Fortunately for us, a script already exists for that. There is a collection of projects, templates, and scripts maintained by some of the lens creator community on GitHub. You can find the script there, or I've also included it below:
// -----JS CODE-----
// @input SceneObject target
// @input vec3 offset
// @input float smoothSpeed = 0.05

var transform = script.getTransform();

if (script.target) {
  var targetTransform = script.target.getTransform();
} else {
  print("SmoothFollow.js: Please assign the target");
}

function onUpdateEvent(eventData) {
  if (script.target) {
    var desiredPosition = targetTransform.getWorldPosition().add(script.offset);
    var smoothedPosition = vec3.lerp(
      transform.getWorldPosition(),
      desiredPosition,
      script.smoothSpeed
    );
    transform.setWorldPosition(smoothedPosition);
  }
}
var event = script.createEvent("UpdateEvent");
event.bind(onUpdateEvent);
The key to this effect is the lerp function. Lerp is short for 'linear interpolation' and will return a position along a line between two points. The lerp function takes the object position, the target object position, and a value between 0 and 1. A value of 0 will be 0% of the way between the two objects aka the object won't move because it stays put. A value of 1 will make our object stick to the target because it is at 100% of the distance aka the position of the target object. Any value in between will add that delayed motion. A value somewhere between 0.05 - 0.25 seems to work well for this style filter. That description may not have been the most clear, so let's add the script and play around with it.
We are going to leave behind our 3D model for a moment. Create a Script resource in the Resources Panel, give it a name if you wish (such as SmoothFollow), copy and paste the above code, and then save the script (ctrl-s or cmd-s). Now add a sphere in the Objects Panel and make sure it is not a child of the head binding. Add a script component to the sphere in the Inspector Panel and choose the SmoothFollow script. For the target object select the head binding and now you should see the magic happen (go ahead and hide your original 3D model while you play around with the sphere for a moment).
As the user moves their head, the sphere will follow it, albeit with a slight delay. Try changing the Smooth Speed input to 0, 1, and different values in between. Values closer to 1 will more tightly track the head, while values closer to 0 will track more loosely. This is exactly the effect we want to apply to the bottom portion of our 3D model. Go ahead and delete the sphere and reenable your 3D model if you disabled it while playing around with the sphere.
If I look at my model hierarchy in the Objects Panel, I can see that I have a Bone, Bone.001, and Bone.001_end. In my case Bone is the root bone and will move my entire model with it. On the other hand, Bone.001 is the second bone and will only move the lower half of my peanut model. It is to this bone that I want to attach the SmoothFollow script. Just like with the sphere, add a script component and choose the Head Binding for the target. Only there's one issue. Even after you get the SmoothFollow script all configured, nothing is happening in the Preview Panel - there is no motion.
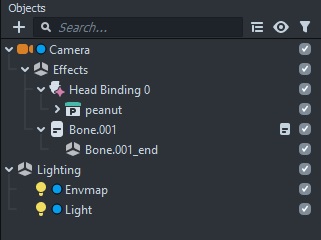
The reason for this is that the bone with the SmoothFollow script is already a child of the Head Binding and thus is already tracking its position. What we need to do is select that bone (in my case Bone.001) and drag it outside of the Head Binding. Once you've done that, the SmoothFollow script will begin to work. In the below screenshot, Bone.001 is now a sibling of the head binding. Now just adjust the Smooth Speed input until you get an effect that you like
Adding the background
All the hard work is now done. We have our 3D model with the face and the wobbly motion. But, it doesn't necessarily look great just being overlayed on our face. Let's add in a fun background.
Start off by adding a Screen Image (which will also add an Orthographic Camera) and set the image texture to your background image of choice. Then be sure to set the Stretch Mode to fill. This will make sure that our background image fully fills the screen without any stretching no matter the screen size. This means you'll get a great looking background on both mobile screens (the Snapchat app) and desktop (Snap Camera). But now we can't see our 3D model.
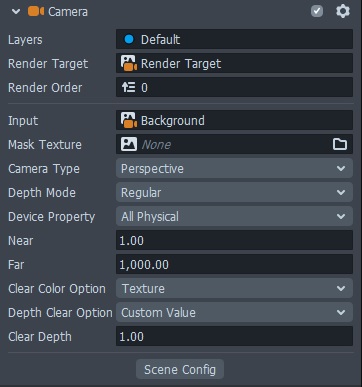
To make sure our background is behind our 3D model rather than in front of it, we are going to setup a new Render Target. Now there are multiple ways to get the background behind our 3D model, but we are going to go with this method to maybe learn a few new things. In the Resources Panel, add a new Render Target and name it Background. Now select the Orthographic Camera and set its Render Target to Background. Then select the original camera in the scene and change the Clear Color Option to Texture and then select the Background render target for the camera Input.
It is also possible to get the background behind the model without the use of a second render target. To do so, you can simply change the render order of the two cameras in the Scene Config so that the Orthographic Camera is rendered first. I opted to go the Render Target method to introduce the idea of customizing the input texture of the camera.
Bonus - Adding a greenscreen
Our custom background will usually do the trick, but video conferencing software like Zoom often have greenscreen features. Let's add a greenscreen to our lens to let users customize their background during Zoom calls.
- Create an Unlit material and change the Base Color to green
- Duplicate the Screen Image that has our background image on it
- Set the image material to the Unlit material you just created
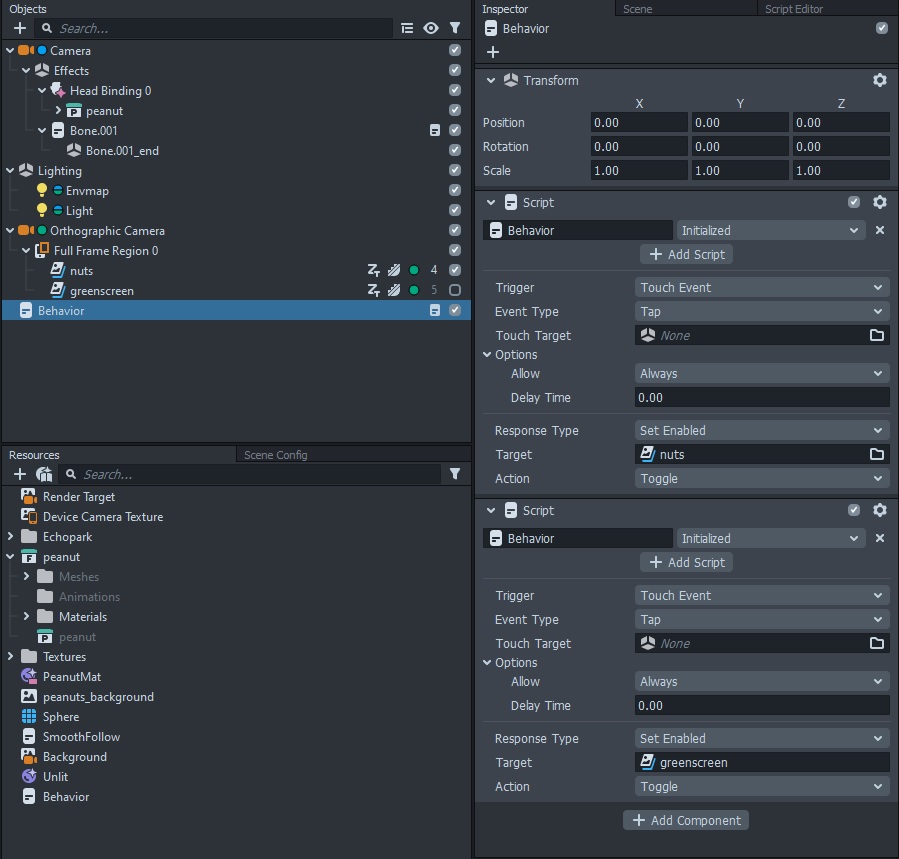
- Import the Behavior script from the Helper Scripts menu in the Objects Panel
- Configure the Behavior script to toggle the enabled state of each Screen Image on tap
- In the Objects Panel, enable the background image and disable the greenscreen image
Now when the user taps, it will toggle between the custom background and the greenscreen background.
Finishing up
All that's left now is submitting your lens! As evidenced by Phil's lenses, this style of lens is popular across both Snapchat and Snap Camera. There's no guarantee your lens will be the next Potato Boss, but in my experience they usually do pretty well. Have fun building!