Control a material parameter from a script
The material editor in Lens Studio is super powerful, but it is separate from the scripting system. If you are coming from Spark AR where both logic and materials exist together in the patch editor, this may be frustrating to you. In this tutorial we'll go over how to bridge the two and use scripts to change material parameters. We'll see how to use the behavior script, the tween script, custom JavaScript, and visual scripting to change material parameters.
Scene setup
The focus of this tutorial is on connecting scripts to materials so I'm going to keep the scene setup pretty simple. All I've done is add a sphere to my scene and given it the "Simple PBR" material. With that added, let's get started!
We'll be going through a few different methods of controlling materials via a script. If you are following along, make sure you disable any scripts before adding new ones to avoid overlapping and potentially conflicting behavior e.g. disable the behavior scripts before moving on to the tween script section.
Behavior script
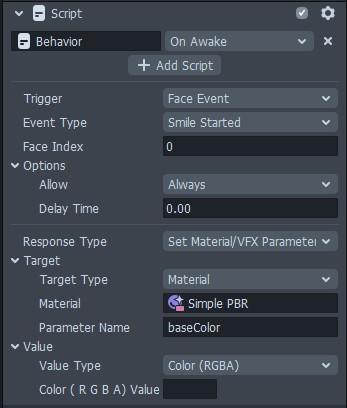
We can use the behavior script as an on/off switch to do some basic changes. I'm going to make my sphere green when the user smiles and red when they are not smiling. Add a behavior script and change the trigger to Face Event and use Smile Started as our event type. Change the response type to "Set Material/VFX Parameter" and wait just a moment for some additional options to appear. Once the input parameter for the material appears, go ahead and select the Simple PBR material.
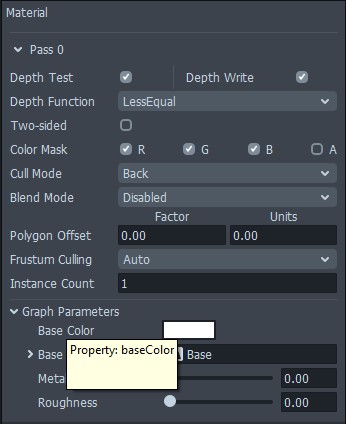
The next parameter, "Parameter Name," is where a lot of people get hung up because it isn't immediately obvious what should go in this space. To find the parameter name, select the material in the Inspector Panel. Find the parameter you want to change and hover your mouse over the name. A tooltip box will appear with the parameter (or property) name. If I hover my mouse over the "Base Color" parameter, I'll see that the parameter name is "baseColor." This is the value we want to use so put that in the "Parameter Name" box on the behavior script.
Now that we have our material parameter figured out, we need to configure the value that we will pass to the material. Change the value type to "Color (RGBA)" and then choose the color you want to set when the user smiles. Now switch the preview video to one in which the user smiles and you should see your sphere change colors!
Now for when the user is done smiling, all you have to do is copy and paste the script component and change the event type and color.
Tween script
The behavior script is nice and all, but it is abrupt, a simple on/off. The tween script allows us to add transitions to our material parameters. Add the tween manager to your scene and then add a "TweenValue" script component.
The tween script doesn't have as many triggers as the behavior script, so if you are wanting to run the tween on certain interactions, I recommend setting up a behavior script to run the tween as the response type.
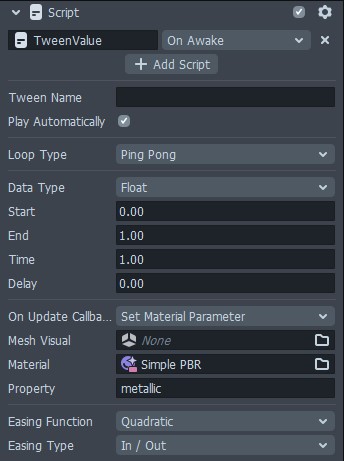
I'm not going to do anything fancy - I just want to transition the metallic value of my material from 0-1 and back to 0 again. I am going to change the loop type to "Ping Pong" and the data type to float. I'll leave my start and end values as 0 and 1 respectively but change the easing type to "In/Out." Now, my tween is running, but it isn't doing anything to my material yet. Let's fix that.
The TweenValue script has a handy option called "On Update Callback" that we want to change to "Set Material Parameter." You can leave the Mesh Visual field blank, but be sure to select your material and for the property (or parameter name) we want to use "metallic" which I got from hovering my mouse over that parameter on my material. You should now see the sphere transitioning from not being metallic, to fully metallic, and back again in a continuous loop.
Custom scripts and custom materials
Let's say you need to do something more complex. Maybe you have a custom material or a custom script. Fortunately it's still straightforward to connect our material and our script. To start I've made a simple HSV material that has hue, saturation, and value input sliders and I've applied it to my sphere.
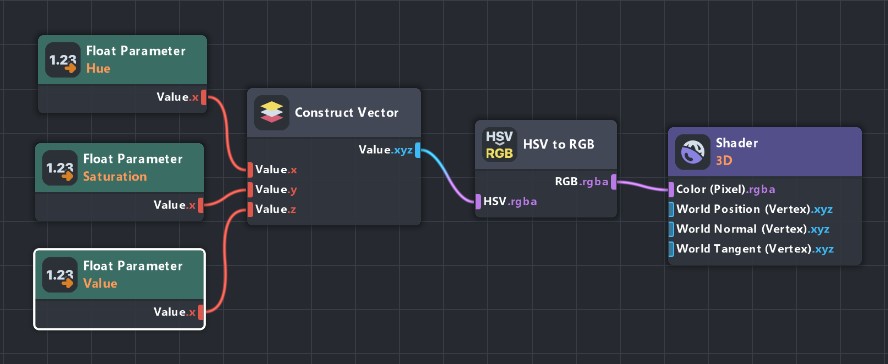
In order to be accessible to a script, any value you want to change on your material must be a Parameter. In my HSV material you can see there are three different float parameters, but you can also use integer, boolean, color, and texture parameters (just to name a few). If you select on of the parameter nodes, you'll see it has a "Title" and a "Script Name." The title is what you'll see displayed in the inspector panel, and the script name is the parameter name we'll be able to access from our script. You can use a different script name than the title, but try to avoid using spaces (it just makes it easier while scripting).
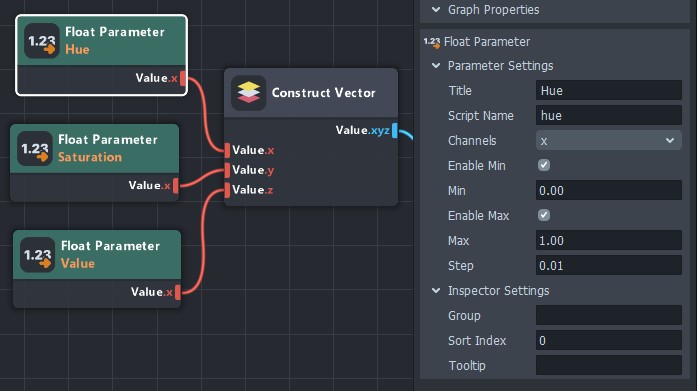
You don't need to write a custom script; you can use the behavior or tween scripts just as we did earlier.
In my script, I want to give the sphere a random color anytime the user taps the screen by adjusting the "hue" parameter. To access the material, I'll add an input for an Asset.Material. The key to setting my material parameter is to access it through the "mainPass" property as seen in the below example.
// -----JS CODE-----
// @input Asset.Material mat

script.createEvent("TapEvent").bind(function () {
  script.mat.mainPass.hue = Math.random();
});
Add your script to the scene and specify the material for the script input. Now each time you tap, the "hue" parameter will be randomly set by the script!
Visual scripting
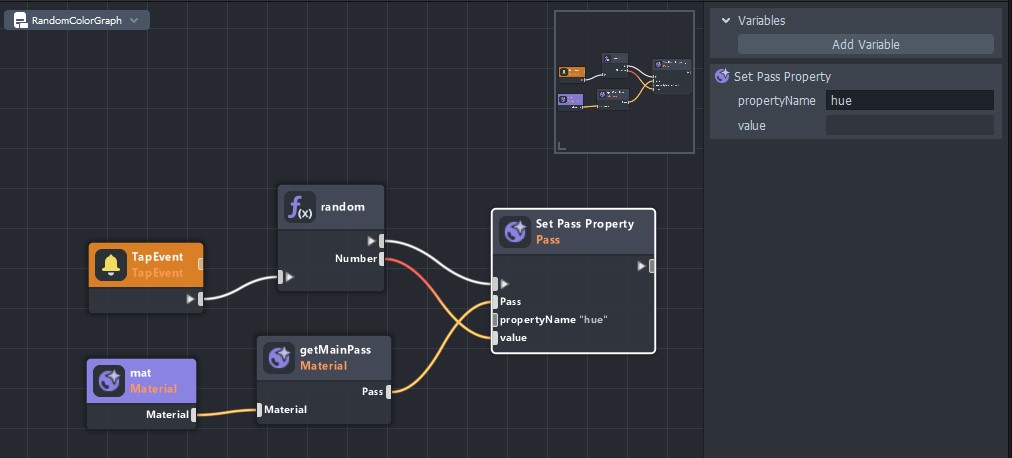
We can do the same thing with visual scripting. You'll want to use the "Set Pass Property" node to specify which parameter/property you want to set and then connect the material's main pass to that along with the new value.
