Create the Time Warp effect in Lens Studio

If you have spent any time at all on Snapchat Spotlight, then you have seen the Screen Scanner Pro/Time Warp/Slit Scan lens in action. This seemingly advanced lens is actually super easy to make, you just need to make one small tweak. We'll go over everything you need to know in this Lens Studio tutorial. You can see an example of this by clicking here or by scanning the snapcode below.
Introduction
Most of our time will be spent setting up our scene. Once everything is set up, we literally have to change one single option to make this effect work. Let's go!
Create the mask camera
A key component of the time warp effect is our mask. The mask will determine where and how strongly our time warp is applied.
- Create a new Render Target and name it Mask
- Create a new Camera name it "Mask" or something descriptive
- Change the camera type to Orthographic
- Set the camera to a new layer (also named "Mask")
Now that you have the camera, we need to create some sort of mask. We are going to be applying this mask to a material later; white will let our material show and black will hide it. You can import a custom image sequence or video, but for this tutorial I'm just going to create my own mask inside Lens Studio using a couple screen images.
- Create a new Screen Image, set it to the Mask layer, and rename to "white"
- Change the Stretch Mode to your liking (I went with Stretch)
- Use a plain white image for the texture
- Duplicate the screen image and rename it to "black"
- Use a plain black image for the texture on the duplicate
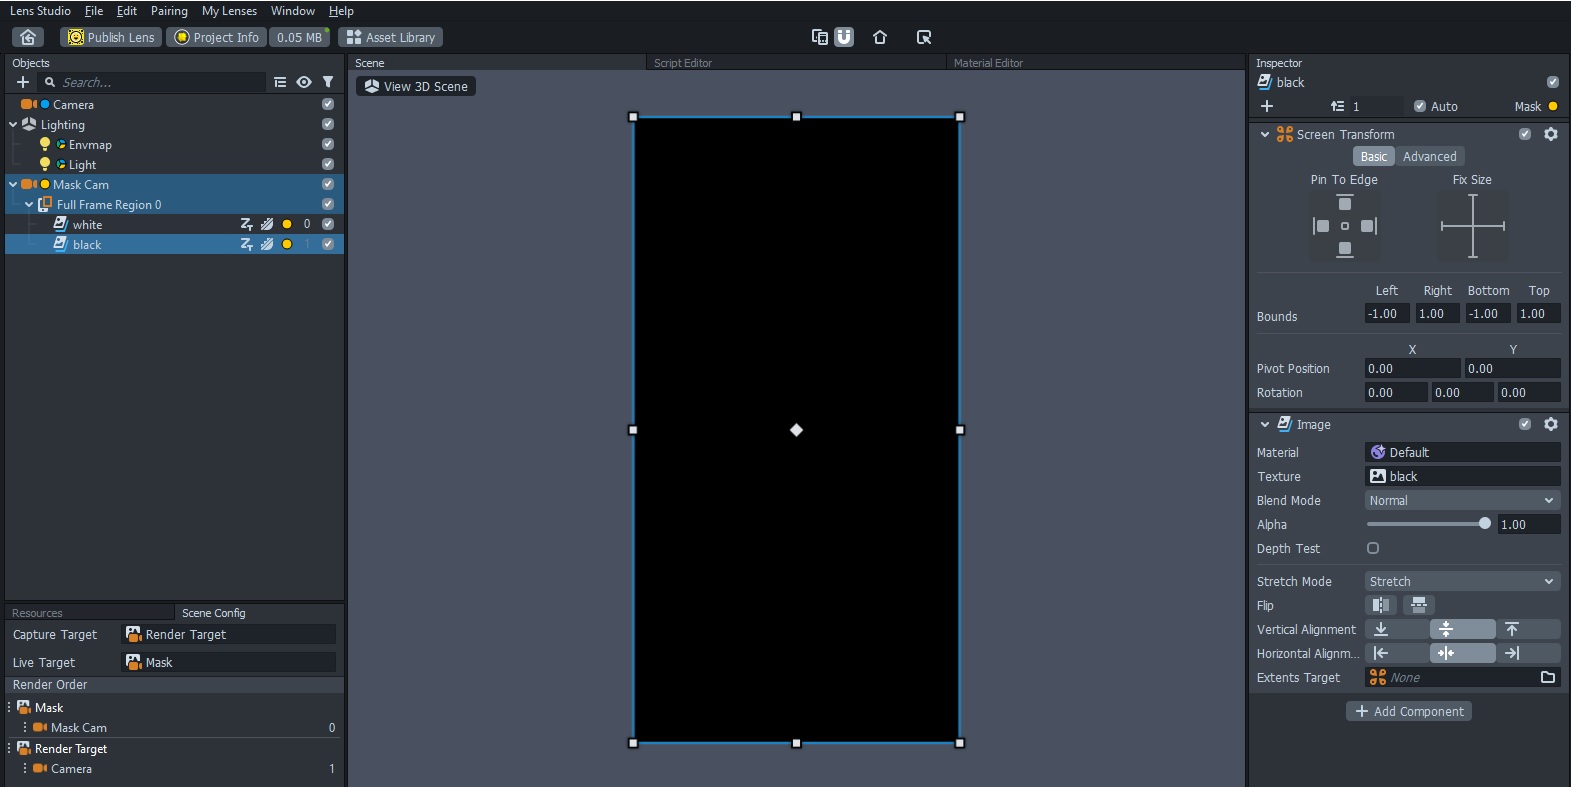
You should see nothing in the preview panel because we are outputting all of this to a separate render target. If you want to see your mask, head to the Scene Config and change the Live Target to the Mask render target. While we're here, drag the Mask render target to be rendered first (before the default Render Target).
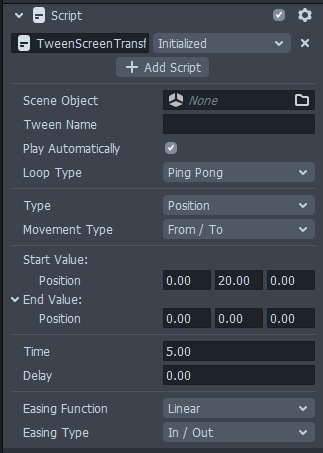
So far this is pretty boring, so let's add some motion to our mask. In the Objects Panel, add a Tween Manager from the Helper Scripts menu. Delete everything that's nested under the Tween Manager and then move the Tween Manager itself to the top of the scene. Select the black screen image and add a script component. For the script, find and select the "TweenScreenTransform" and adjust the settings as desired. Here is how I setup mine.
Now that we see our mask is doing something, return to the Scene Config and change the Live Target back to the default Render Target.
Create the output image
Deselect everything in the Objects Panel and create a new Screen Image (I renamed mine to Output). This should create a new Orthographic camera as well. Now in the Resources Panel create an Unlit Material, change the blend mode from "Disabled" to "Normal," and enable the Opacity Texture. Select your new screen image and swap out its material for this new unlit material. Set the Texture of the screen image to the Device Camera Texture and for the Opacity Texture select the Mask render target. I also changed my Stretch Mode to Stretch because I'm paranoid like that.
The time warp
So far this is all super underwhelming. We've done a lot of work and are yet to see any sort of time warp going on. Not to worry, we are ready to activate it! Select the default Render Target in the Resources Panel and change the Clear Color to "None." That's it. Simple. If you look in the Preview panel, you'll see your time warp effect working and reversing as your mask texture changes. If it's hard to see anything happening, choose a preview with more movement (I chose the "Dance" video).
Tracers or motion blur effect
Ben Knutson (another lens creator) has a neat little tutorial on creating a tracers or slow-mo effect using two separate render targets. We can create the same sort of effect with our setup, but with our method we actually get some control over the strength of the effect. Turn off the tween on the black screen image and instead play with the Alpha value. A low alpha will give a mild effect, while a value closer to one will give a more pronounced effect. Need to add some motion blur to your lens? Now you have it!
How it works
So how does this effect work anyway? When Lens Studio (or Snapchat in the case of the published lens) is rendering each frame, it needs something to start with. Usually when changing the clear color, you are dealing with the clear color option on your various cameras. For example, maybe you have a separate render target to hold UI elements. On the UI camera, you would have your main render target act as the input texture. This would lead to your UI being drawn on top of your effect. But in this case we changed the clear color option for the render target itself, not the camera. The clear color option for the render targets acts the same way as for the cameras. When "None" is selected for the camera, it grabs whatever is defined on the render target. The default setting for render targets is "Background" which is the Device Camera Texture. So every time the frame is updated, we start with what the camera sees and we layer our effects on top of that. But when we select "None" for the render target, we grab whatever already exists on screen and draw over that.
So let's return to the time warp effect. We start with a completely white mask which means on our output screen image we see the entire thing - aka the Device Camera Texture. Now on the next frame the black screen image has entered the scene. This portion of the screen is not updated with the current frame of the Device Camera Texture because of the mask. Since our clear color option on the render target is set to None, that part of the screen is not updated; it reuses what was there before. As we slide the black screen image down the screen, the same process repeats and we end up with the time warp effect.