Tritone material in Lens Studio
In this tutorial we'll go over how to create a tritone material inside Lens Studio. This material will be configurable, reusable, and will provide a brief introduction to the power of the material editor. You can see an example of this by clicking here or by scanning the snapcode below.

Setting up the scene
Add a Graph Unlit material in the Resources Panel and rename it "Tritone" or whatever suits your fancy. We'll also need something to preview our material on, so add a Screen Image in the Objects panel, set the stretch mode to Stretch, set the material to the new Graph Unlit material you just created, and set the texture to the Device Camera Texture.
Creating the material
Select your tritone material in the Resources Panel and open up the Material Editor. If the Material Editor is not visible, go to Window -> Panels -> Material Editor. Go ahead and delete the Float Parameter and Scale Coords nodes and connect the Surface UV Coord 0 to the Texture 2D Parameter.
To create the tritone effect we need a way to map portions of our image to three distinct ranges. Start by adding a Luminance node between the Texture 2D Parameter and Shader nodes. You should now see a grayscale image in the preview panel. The output of the this node is in the range 0-1 where 0 is black and 1 is white. This is what we'll be using for our three ranges.

Creating the first split
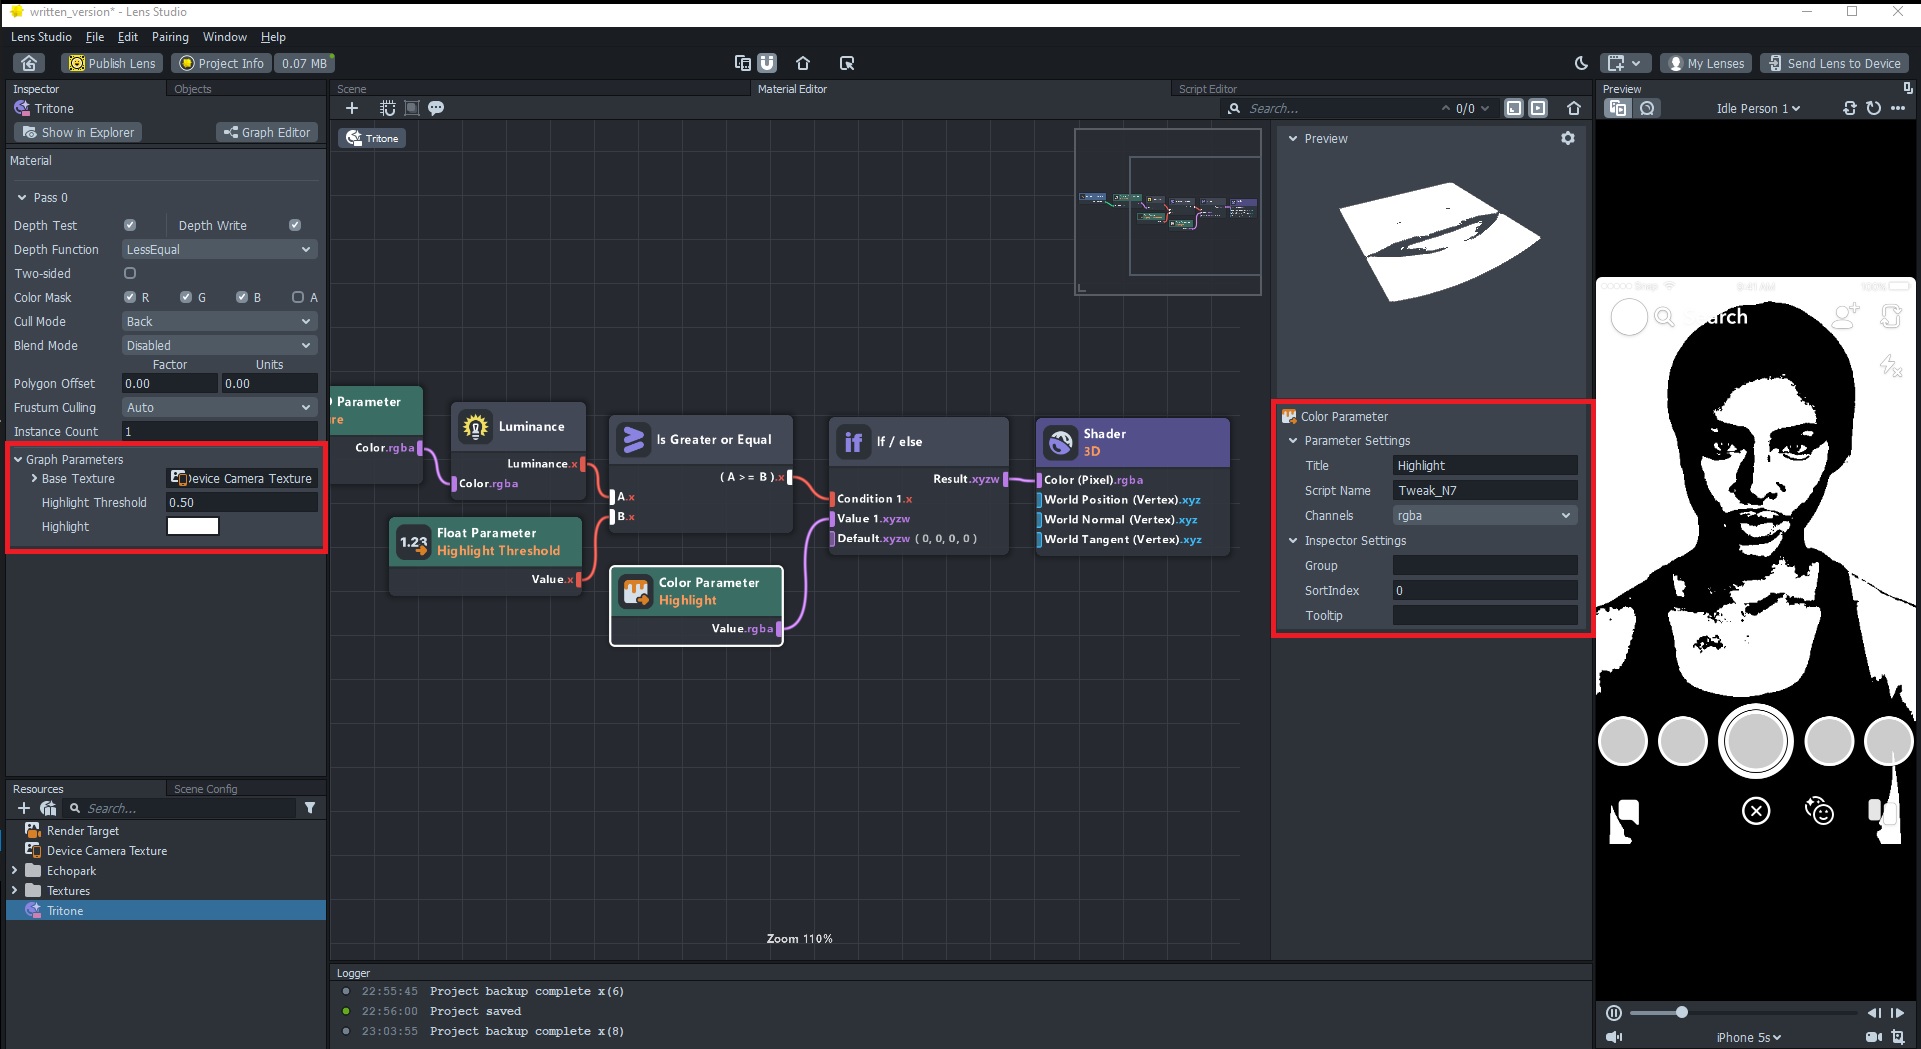
Now that we have the grayscale version of our input texture we can start to split it into ranges. There are two parts to this process - 1) determine if the luminance falls within a particular range and 2) make a decision based on the result of that check. Let's start with our "highlight" range. Add an Is Greater or Equal node and connect the Luminance into the top input. Rather than set our threshold value directly on the node, we are going to add a Float Parameter to connect to the bottom input. I set the title on mine as "Highlight Threshold." The reason we are using a Float Parameter node is to allow us to change this threshold on the material settings without having to open the material editor every time.
Next add an If/else node and connect the output of the Is Greater or Equal node to the top input. Create a Color Parameter node, give it a title (e.g. "Highlight") and connect it to the middle input of the If/else. Now take the output of the If/else node and connect it to the 'Color' input of the Shader node. The preview panel should turn completely white, so now select your material in the Resources Panel and change the 'Highlight Threshold' in the Inspector Panel. A value of 0.5 is a good starting point. Now in the preview panel you should see a two-toned image.
I moved my Inspector Panel to occupy the space of the Objects Panel. This gives me a little more room in the Material Editor. You can click and drag on the title of any panel to move it. If you mess something up or want to quickly revert the interface, go to Window -> panels -> Default Layout.


Creating the second split
So for our first color split we only had to check to see if our luminance was greater than or equal to some value. We did not have to specify an upper bound because the luminance value won't go above 1, so in this particular case anything between 0.5 - 1.0 gets our highlight color. Now that we are moving on to the midtones, we will have to specify both the upper and lower bounds.
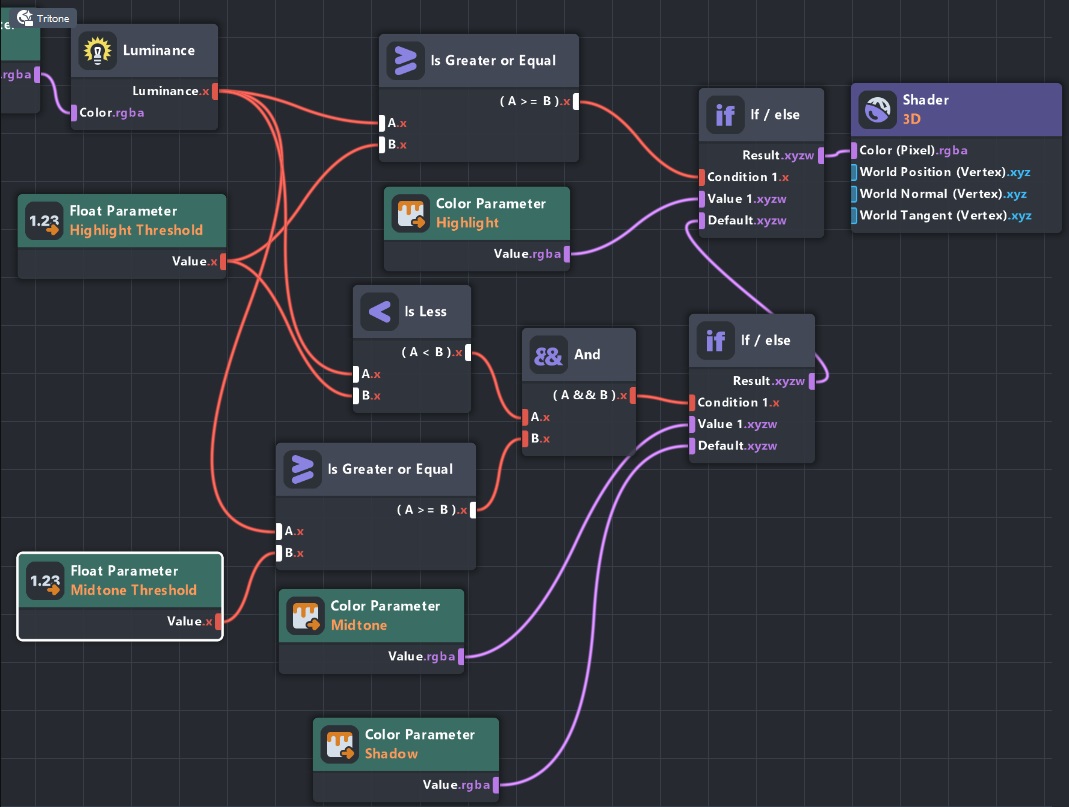
What we are going to do here is create a new Float Parameter node for our "Midtone Threshold" and two Color Parameter nodes for our "Midtone" and "Shadow" colors. For our midtones, we need to check to make sure the luminance value is both less than our highlight threshold and also greater than or equal to our midtone threshold. If both those conditions are true, we'll use the midtone color, otherwise we'll use the shadow color. And when that is all said and done, the output of that check will become our new "else" choice for our original If/else node. The below image shows the final setup, and the video version of this tutorial walks through the whole process step-by-step.

Once the material nodes are setup, you'll probably see something funky in the Preview Panel again. Choose your Midtone and Shadow colors in the Inspector Panel and set a Midtone Threshold. I went with a value of 0.3. Now you should be seeing your tritone effect.
Including other elements
So far we've been using the Device Camera Texture as our input for the tritone effect. If there is nothing else going on in your scene, this works great. However, if you add any sort of image or object, it won't show up because we are using the raw image that the camera sees as our input to the material. We can fix this two different ways
Using a Screen Texture
In the Resources Panel add a Screen Texture and set that as the Base Texture on the tritone material. Why does this work? The Screen Texture grabs everything else going on in the scene and includes it on top of the Device Camera Texture. Now if you have some sort of 3D object attached to the user's head, it will be included in the tritone effect.
Using a Post Effect
Another alternative would be to delete our Orthographic Camera and Screen Image and instead add a Post Effect. It can be anything, just go with a Color Correction. Select the Post Effect in the Objects Panel, and then over in the Inspector Panel choose your tritone material for the Post Effect material (you also might need to set the texture to a Screen Texture). This also has the end result of including any other scene objects in the effect because now our tritone material is being applied as a post effect.
Finishing up
With just a few nodes in the material editor we were able to create a configurable and reusable tritone material. Explaining node setups can get a little confusing in text form, so be sure to watch the video for perhaps a more clear explanation of what to add and how to connect it all. You can export the material by right-clicking on it in the Resources Panel and choosing the Export option. Then it is simply a matter of importing and choosing your colors and thresholds if you want to use it in another project.
