Color Corrections

Why add a color correction?
When you see a professional photograph or go to a movie, what you are seeing is not exactly what the camera saw; some sort of color correction has been applied. It might be to enhance certain features of the image or to set the mood. The Snaps you send to your friends might not be as refined as a Hollywood blockbuster, but you can certainly use some color correction in your lenses the same way the movies do. A color correction will help you achieve a particular aesthetic or feel for the lens.
Color corrections might be applied as presets in the case of photos or as LUTs (lookup tables) in the case of video. Lens Studio uses LUTs to apply color corrections, but they aren't quite the same as what video editors or Photoshop uses. Instead, they are particular png images that have had color corrections applied to them. Lens Studio has quite a few built-in, or you can create your own using something like Photoshop. Let's talk about each of those methods.
Using the built-in color corrections
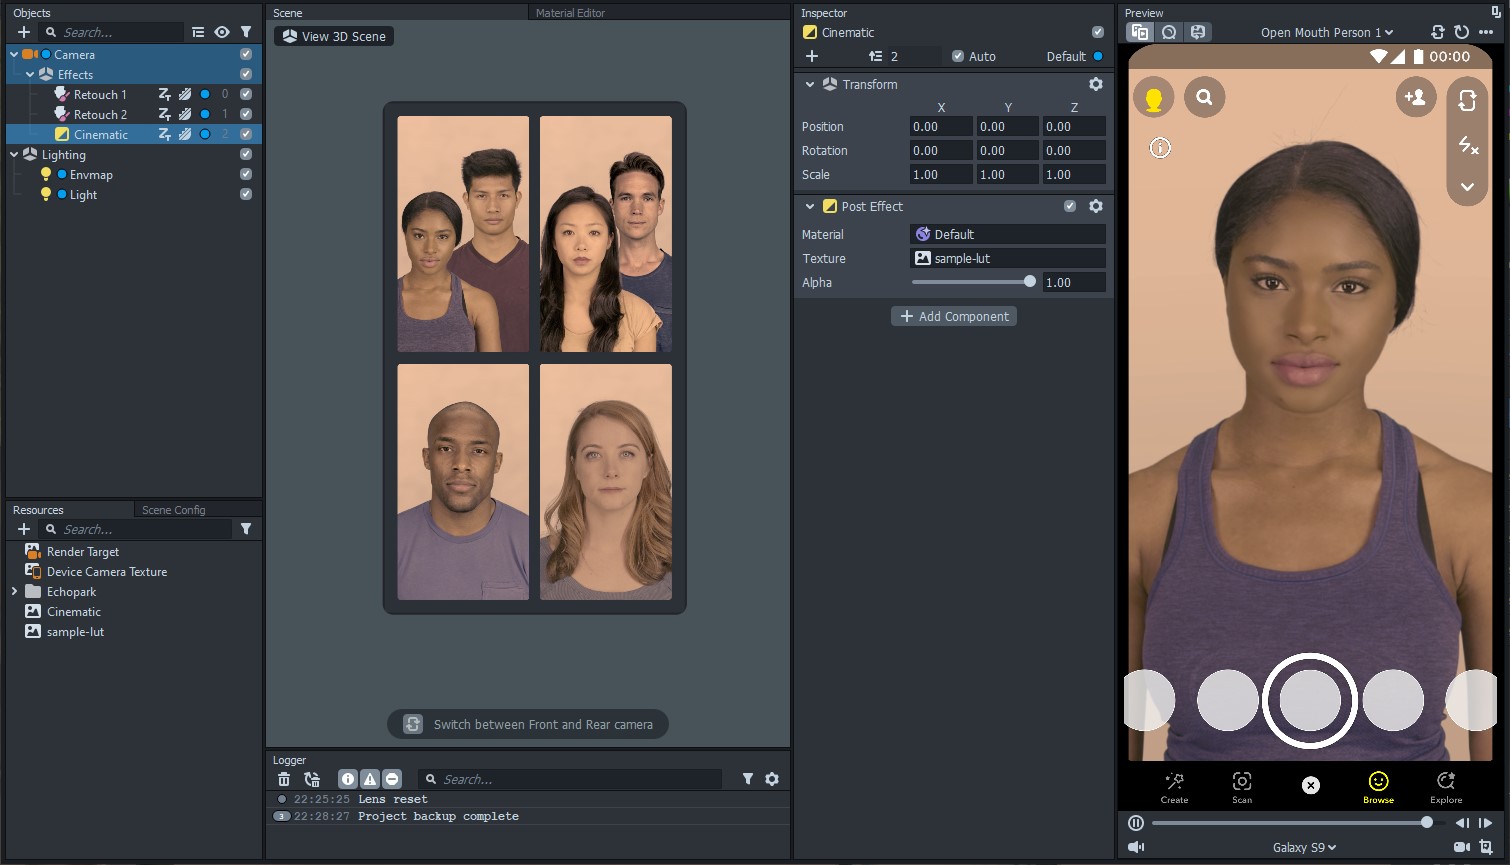
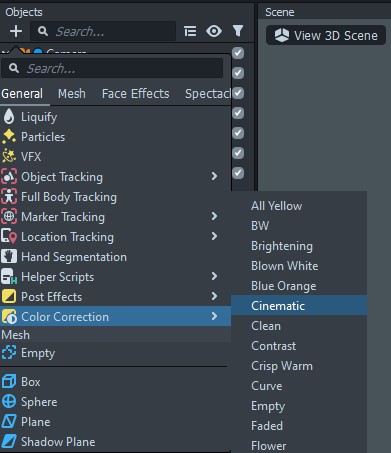
Lens Studio comes with 39 different LUTs built right in. I have a handy visual reference guide to all of them here. The easiest way to add a color correction would to be import one or more of those built-in LUTs. You can control the strength of each color correction to dial in the exact look you want for your lens. To add one of the built-in LUTs, click on the "+" button in the Objects Panel, find the "Color Correction" entry, and then choose the LUT you want to use. When your color correction is selected in the Objects Panel, there will be an "Alpha" slider present in the Inspector Panel which will allow you to control the strength of the color correction. By adjusting the strength and layering a few color corrections together, you can create tons of interesting looks without ever needing to leave Lens Studio.
Creating your own LUTs
The built-in LUTs are great, but maybe you're a photographer with your own presets or you need a particular look. In that case you'll need to create your own LUT. Here I'll be walking through the steps using Affinity Photo, but that's by no means the only way to make LUTs. Here are some tutorials for if you use VSCO, Lightroom, or Photoshop. For a free alternative I recommend using Photopea; I have a tutorial here which goes over how to use it. I do not recommend you use GIMP though. GIMP is a fantastic image editor and I used it for many years. However, the edits are all destructive meaning they actually modify the image; you can't go back to fine tune your changes or apply them to a separate image. For that reason I recommend Photopea over GIMP if you are looking for something free.
Example images
While creating our own color correction, we need a way to preview our changes. Take some pictures with your own phone or head to a site like Pixabay or Pexels for some free stock photos. Stay from images that have a clear color style because that will cause a mismatch between what we see in our photo editing software and our lens on Snapchat. Try to find some images with different lighting conditions (light and dark) and grab a variety of skin tones. Once you've found some example images, create a new project in your photo editing software, load in all your sample images, then lay them all out. The size of your project doesn't matter, just make sure you have enough space to see your sample images. I'm going with 2000px by 1000px.
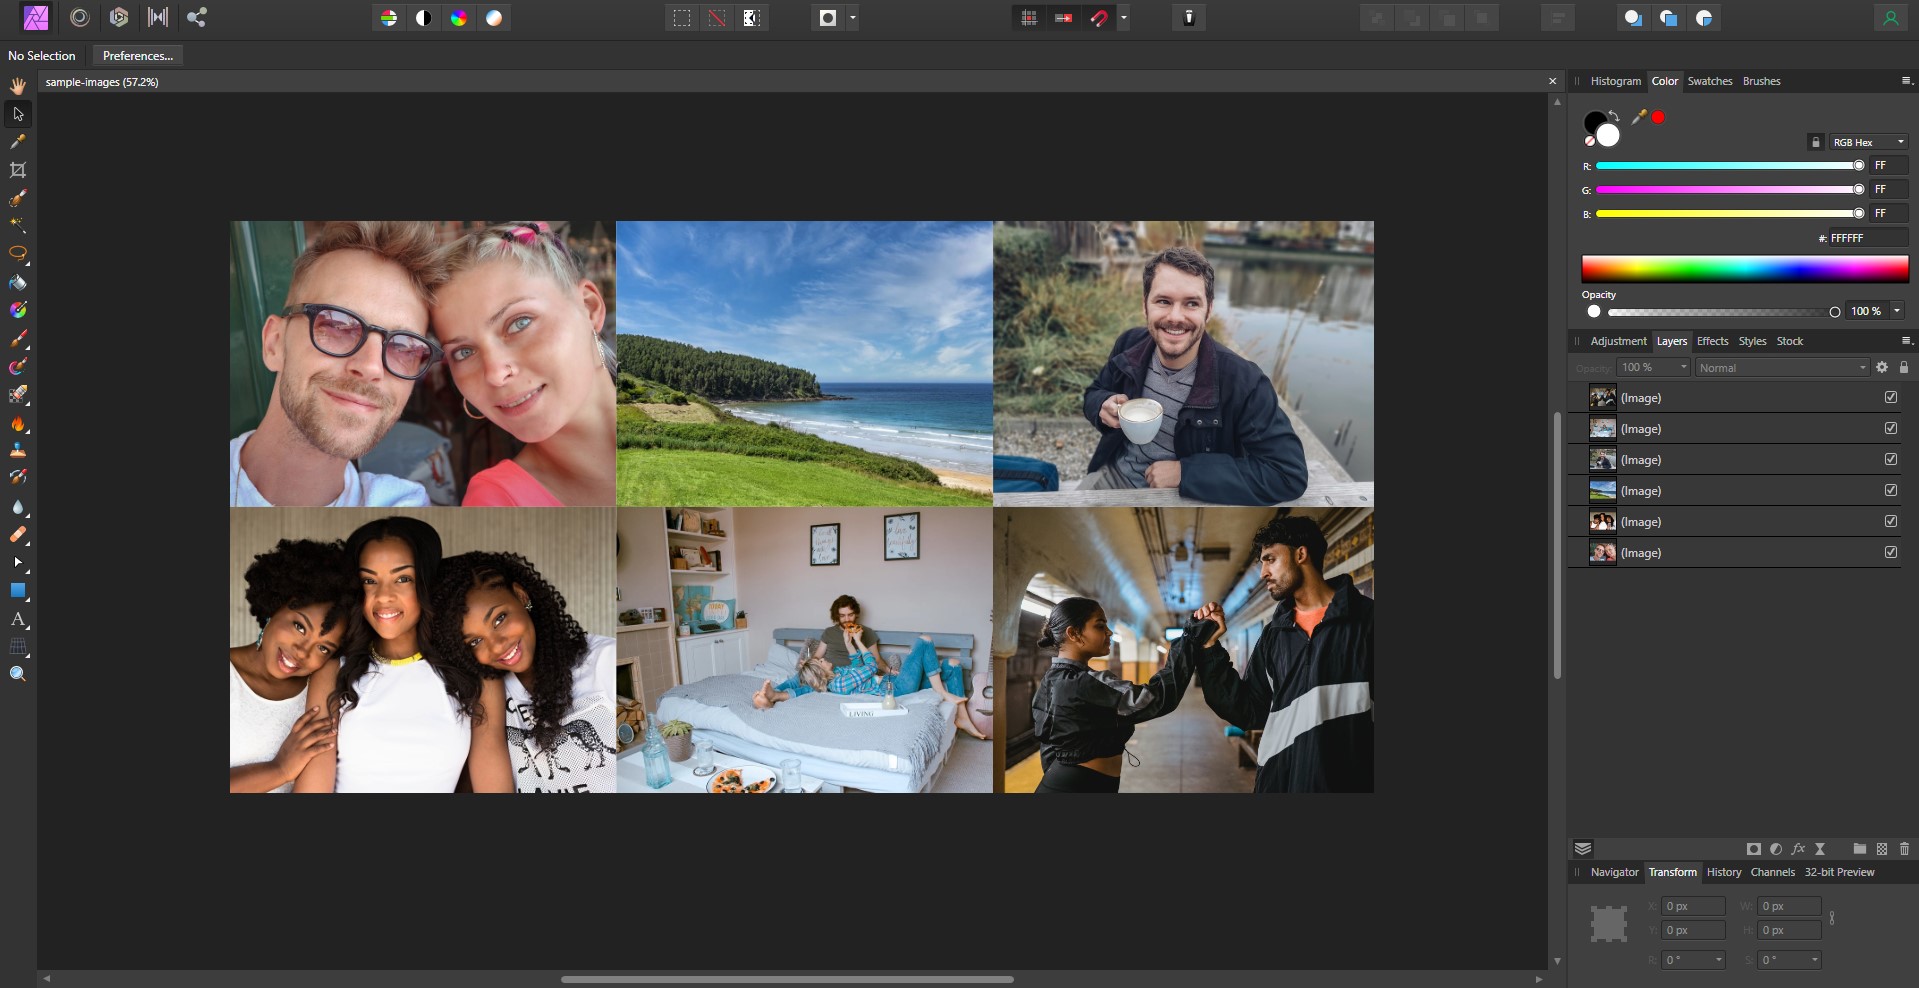
Make your edits
We are going to make all our changes with adjustment layers so that we can swap out any image we want. If you have never worked with adjustment layers before, look up some tutorials for the software you are using. Also keep in mind that the only changes we can make are those that have to do with colors - you have to imagine each individual pixel is independent of all the rest. Things like blurring, sharpening, noise overlays, etc. won't work. But things like adjusting the contrast, saturation, color balance, etc. do work.
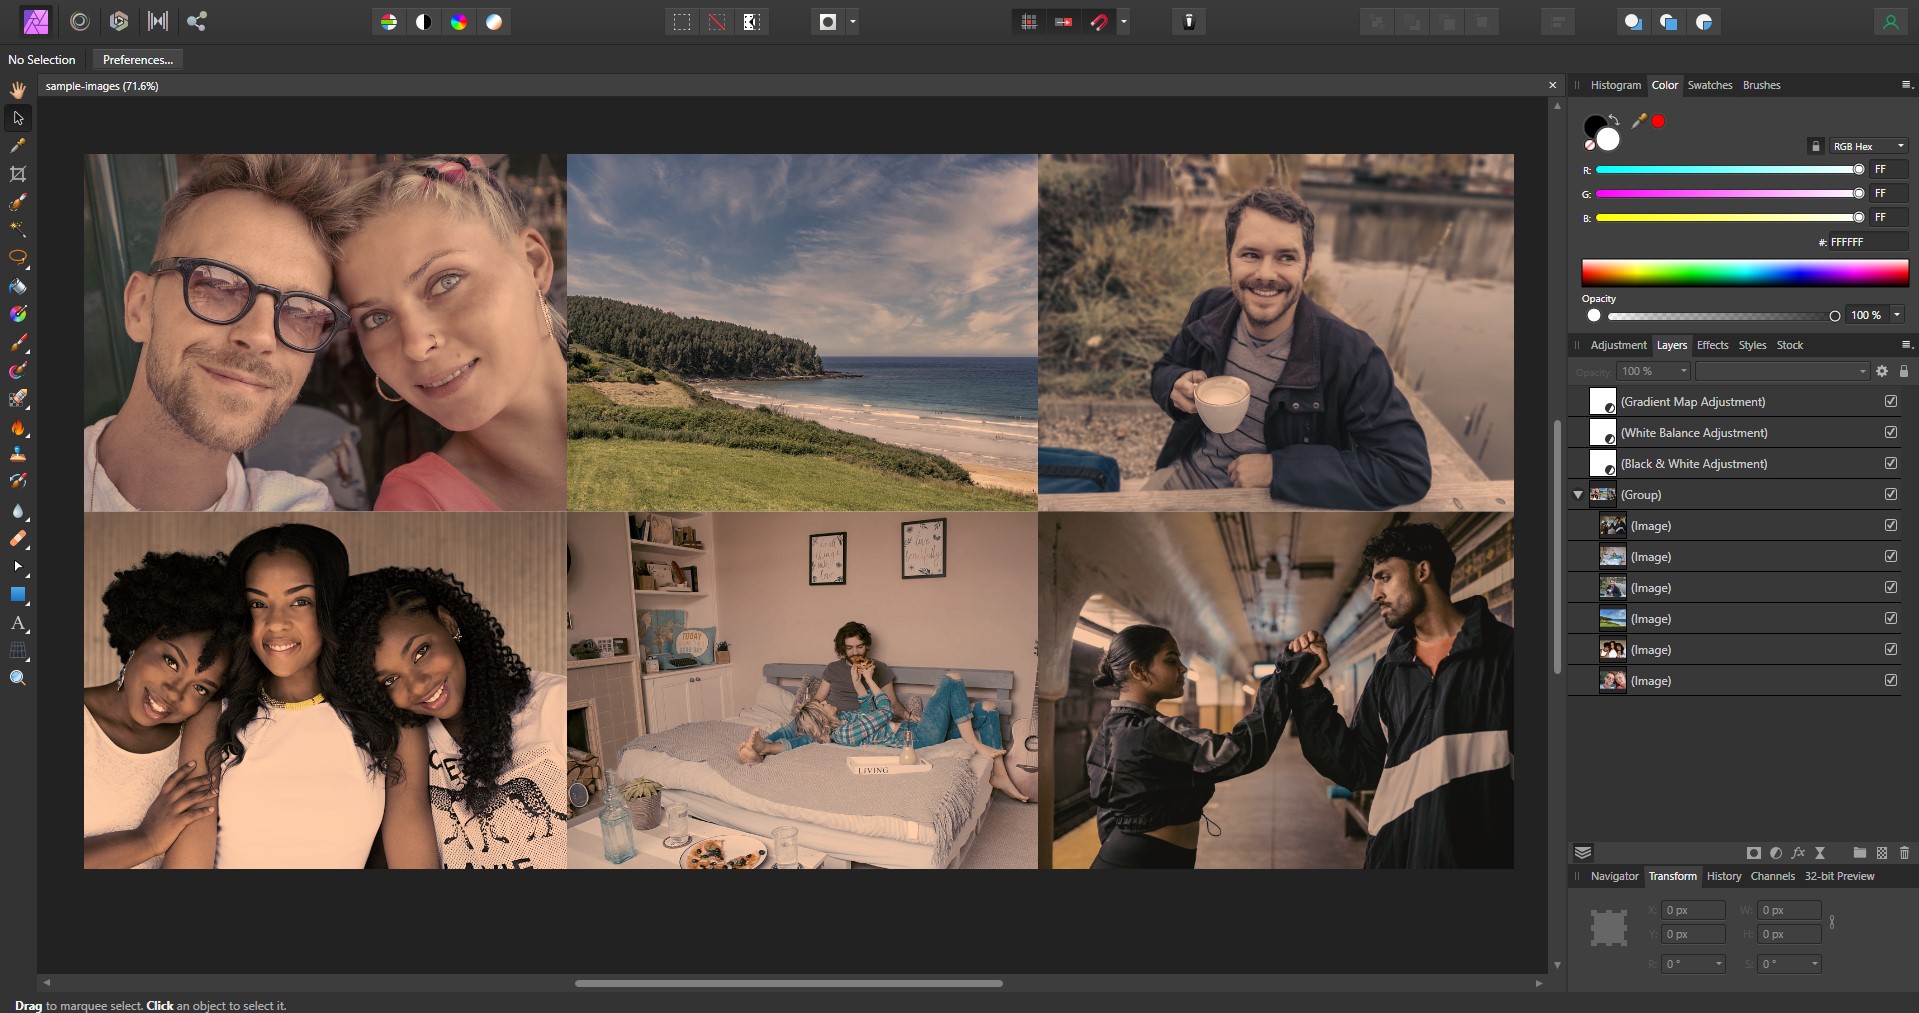
Create the LUT
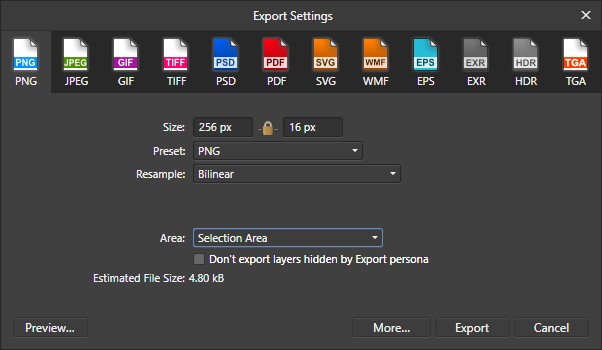
We've made our adjustments, but now we need to get them into Lens Studio. Some software will let you export a LUT file, but that is not what we want to do - Lens Studio cannot read them. Instead, head over the Lens Studio page for post effects, scroll down a bit, then download the Base Lookup Table - it will be a png file. Once you've downloaded that, load it into your image editor in the same project you made the color corrections in. Make sure the image is below all the adjustment layers so that the color corrections are applied to it. Don't worry about scaling up the image either, leave it just as it is.
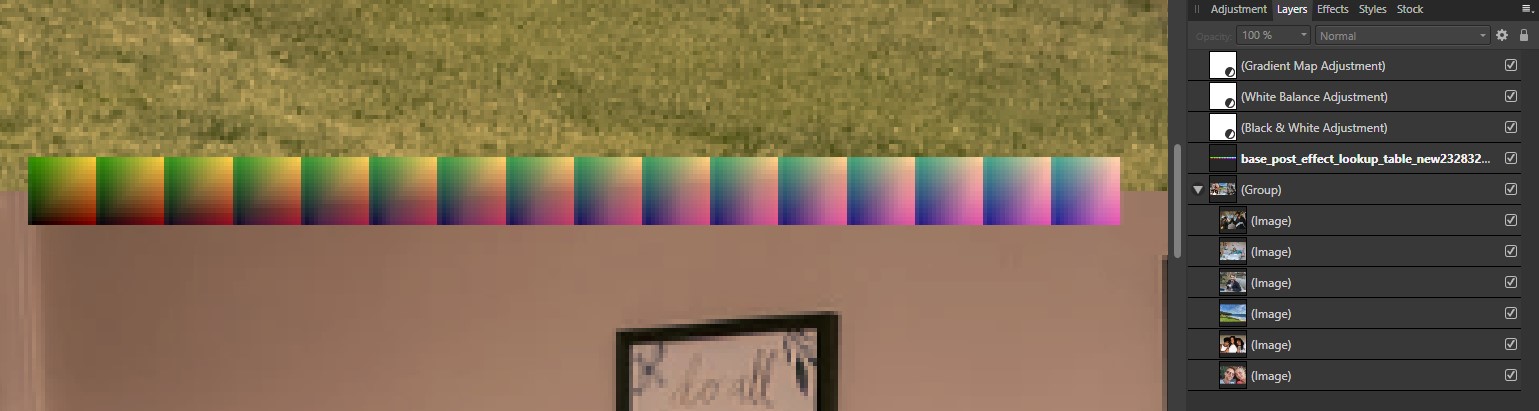
Our next step is to export the base lookup table with our changes applied. The exact steps will depend on the software you use, so if you aren't sure I recommend you find your software of choice in this list here to see how they do it. No matter which software you are using, make sure you export the lookup table as a png file. In my case I'm using Affinity Photo so these are the steps I follow:
- Select my base lookup table layer
- Go to File -> Export (not Export LUT, just Export)
- Make sure the file format is png
- Change the Area option to "Selection Area"
- Double check and make sure the export size is 256px by 16px
- Click Export
Import into Lens Studio
Once you've exported your lookup table, the next step is to import it into Lens Studio. Click the "+" button in the Resources Panel then select the png file you just exported. This will import our LUT, but it won't apply it to our lens. To apply your LUT, add any color correction to your lens from the Objects Panel then in the Inspector Panel change the texture to the one that you just imported.