Grain Overlays

Why add grain?
Grain overlays are one of those things that show up repeatedly in beauty lenses. It is by no means a requirement to include a grain overlay, but it can help give a more vintage feel to your filters. If you want to give your users a choice, in a later tutorial we'll be going over how to enable/disable grain when the screen is tapped. But for now let's take a look at how to add grain to lenses.
Finding grain
Do not Google "film grain" and download an image you like. Do not Google "film grain" and download an image you like. Yes, I did repeat myself there. Do not Google "film grain" and download an image you like. Just because an image appears in a Google search result does not mean you can use it in your projects. The chances of the owner of the grain image finding your lens and having it taken down for copyright infringement are essentially non-existent, but if you ever want to get paid by clients to make lenses and filters, you better make sure you are in the habit of checking the copyright of anything you use in your lenses.
Fortunately it isn't hard to find grain images that are free to use. My favorite place to get film grain is from Film Composite. They offer paid overlays, but they also have a really good assortment of free grain overlays. Find one or more images you like and download them.
Importing into Lens Studio
There are two routes to go with grain overlays - static and animated. Static grain overlays consist of a single image while animated ones consist of multiple images. Let's go over each.
Static grain overlay
A static grain overlay is super simple to import. All you need to do is click the "+" button in the Resources Panel, click on "+ From Files," find your image, and import it. You may need to resize your image in an image editor prior to importing if the file size is too big, but other than that it is super straightforward.
Animated grain overlay
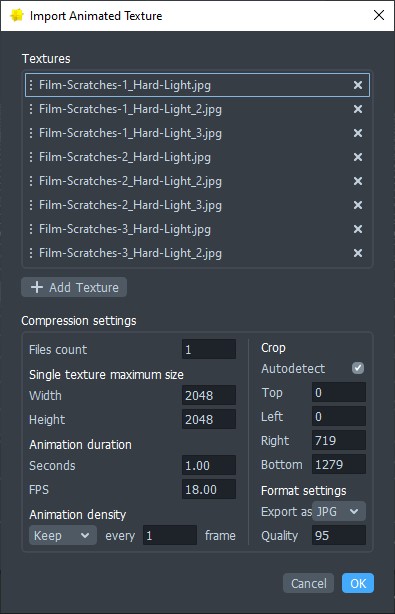
For an animated grain overlay, we are going to import our images as a 2D animation. This does not work with video, only image sequences. Inside Lens Studio, click the "+" button in the Resources Panel, find "2D Animation From Files," and then select all your frames. This will open a new window with some different settings. You don't really need to change anything here for a grain overlay, so you can just click the "OK" button. The main option you ever would need to change here is the image format (either jpg or png) depending on if your animation frames contain transparency.
Adding the grain as an overlay
Now that we've imported our grain, we need to add it to the scene. Start off by adding a "Screen Image" in the Objects Panel. If you don't already have an orthographic camera in the scene this will create one, otherwise it should add the screen image to an existing orthographic camera.
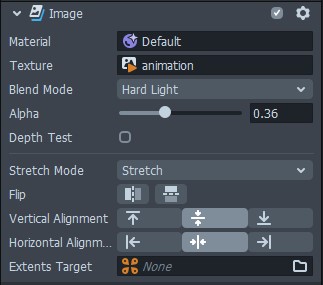
With the screen image selected, change the texture to either the static grain image or the 2D animation that you imported. Then change the "Stretch Mode" to either "Fill" or "Stretch." This will ensure your overlay covers the entire screen and does not leave any gaps.
At this point your grain should be filling the preview, but you won't be able to see the rest of your lens. The last step will be to change the blend mode of the overlay. If you downloaded your grain from Film Composite, they will include the appropriate blend mode in the description of the grain (e.g. Hard Light, Overlay, etc). If you got your grain from somewhere else, check to see what they recommend or start out with overlay. If the grain is too strong, you can adjust the alpha of the image to add some transparency and reduce the strength of the grain.